


 18935
18935
1. Product Description
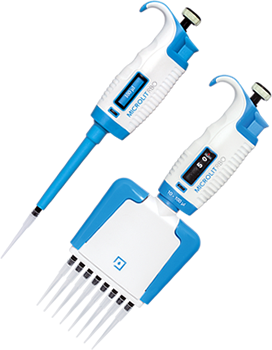
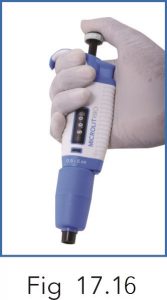
MICROLIT RBO Micropipettes are continuously adjustable, general-purpose pipettes, used for sampling and dispensing accurate and precise volumes.
They operate on the principle of air displacement (i.e. an air interface is present between the piston and the reagent/solution) and use a detachable, disposable tip. The desired volume is determined by the following formula:
V=πr2h
V = desired volume,
π = constant (3.14),
r = radius, and
h = vertical distance travelled by the plunger
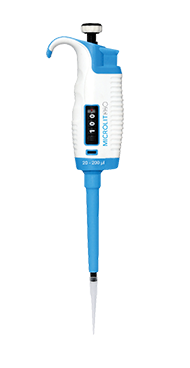
- Single Channel Micropipettes cover volume range from 0.2ul to 10ml
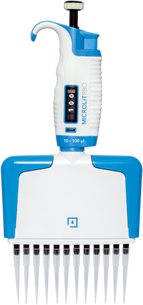
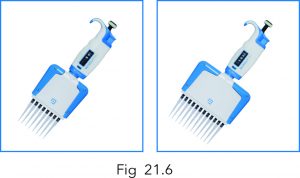
- Multichannel Micropipettes cover volume range from 0.5ul to 300ul
2. Digital Display
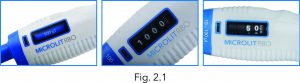 |
Single Channel and Multichannel Micropipettes offer easy to read Digital Displays.
3. Raw Material
The instruments are made of mechanically durable, autoclavable material.
4. Micropipette Operation
Setting the delivery volume
| S.No. | Variable Volume Range Micropipettes | Fixed Volume Range Micropipettes |
| 1. | Set the delivery volume using the push button on the top of the micropipette. To increase the delivery volume, turn the push button counter-clockwise. To decrease the delivery volume, turn it clockwise. |
NA |
| 2. | Make sure that the desired delivery volume clicks into place. | NA |
| 3. | Do not set a volume that lies outside the micropipette’s specified volume range. | NA |
Note: Using excessive force to turn the push button outside the range may jam the mechanism and eventually damage the micropipette.
5. Tip Ejection
 |
Each pipette is fitted with a Tip Ejector Button which helps to eliminate the risk of contamination. In order to eject the tip, point the micropipette at a suitable waste receptacle and press the ejector button with your thumb.
6. Pipetting Technique
- Press and release the push button slowly, at all times, particularly when working with high viscosity reagents/solutions. Do not let the push button to snap.
- Make sure that the tip is firmly attached to the Tip cone.
- Before you begin your actual work, fill and empty the tip 2-3 times with the reagent or solution that you will be pipetting.

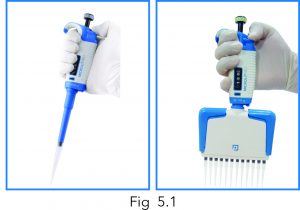
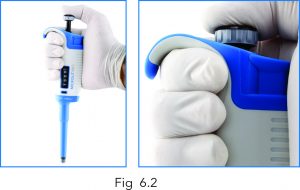
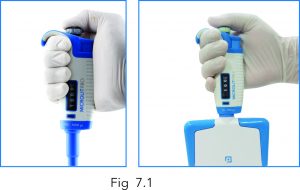
- Hold the micropipette in an upright position while aspirating. The Grippy must rest on your index finger.
Make sure that the tips, the micropipette and the reagent/solution are at the same temperature.
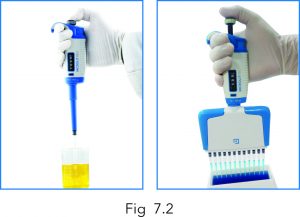
7. Forward Technique
- Fill a clean reagent/solution reservoir with the reagent/solution to be dispensed.
- Press the push button till the first stop.
- Dip the tip under the upper surface of the reagent/solution in the reservoir, till a depth of about 1 cm. Slowly release the push button.
- Withdraw the tip from the reagent/solution. Let it touch against the edge of the reservoir to remove the excess reagent/solution.

- Deliver the reagent/solution by gently pressing the push button till the first stop. After a delay of about one second, stop. This action will empty the tip.

- Release the push button to let it retract to the ready position. If necessary, change the tip and continue pipetting.
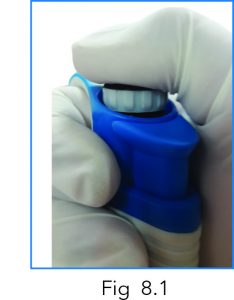
8. Reverse Technique
The reverse technique is suitable for dispensing reagents/solutions that have a high viscosity or a tendency to foam easily. It is also recommended for dispensing very small volumes.
- Fill a clean reagent/solution reservoir with the reagent/solution to be dispensed.
- Press the push button till the second stop.
- Dip the tip under the upper surface of the reagent/solution in the reservoir, till a depth of about 1 cm. Slowly release the push button.
- Withdraw the tip from the reagent/solution. Let it touch against the edge of the reservoir to remove the excess reagent/solution.
- Deliver the reagent/solution by gently pressing the push button till the first stop. After a delay of about one second, continue pressing the push button all the way till the second stop. This action will empty the tip.
- The remaining reagent/solution must either be discarded with the tip or pipetted back into the container to be dispensed.
9. Repetitive Technique
The repetitive technique offers a rapid and simple procedure for repeated delivery of the same volume.
- Fill a clean regent/solution reservoir with the liquid to be dispensed.
- Press the push button till the second stop. Refer to Fig.
- Dip the tip under the upper surface of the reagent/solution in the reservoir, till a depth of about 1 cm. Slowly release the push button. This action will fill the tip.
- Withdraw the tip from the reagent/solution. Let it touch against the edge of the reservoir to remove the excess reagent/solution.
- Deliver the reagent/solution by gently pressing the push button till the first stop. Hold the push button at the first stop. Some liquid will remain in the tip and this must not be included in the delivery.
- Continue pipetting by repeating step 3 and 4.
10. Pipetting of Heterogeneous Samples
Let’s assume that we have to determine the deproteinization in blood glucose.
- Use steps 1 and 2 of the forward technique to fill the tip with blood. Wipe the tip carefully with a dry and clean tissue.
- Immerse the tip into the reagent/solution and press the push button till the first stop, making sure the tip is well below the surface.
- Release the push button slowly to let it retract to the ready position. This will fill the tip. Keep the tip in the solution. Press till the first stop and release slowly. Keep repeating this procedure until the interior wall of the tip is clear.
- Finally, depress the push button all the way to completely empty the tip.
11. Calibration and Adjustment
- All the micropipettes are factory calibrated and adjusted to give the volume ads specified with distilled or deionized water, using the forward pipetting technique.
- It must be noted that the use of other pipetting techniques may affect the calibration results. The micropipettes are constructed to permit re-adjustment for other pipetting techniques or solutions/reagents of different temperatures and viscosities.
12. Device Requirements and Test Conditions
Use an analytical balance. The scale graduation value of the balance must be chosen according to the selected test volume of the micropipette.
Readable Volume Range
| Graduation under 10 ul | 0.001 mg |
| Graduation under 100 ul | 0.01 mg |
| Graduation above 100 ul | 0.1 mg |
The test liquid water is distilled or deionized “grade 3” water, conforming to ISO 3696. All the tests are done in a draft-free room at a constant (±0.5°C) temperature of water pipette and air between 15°C to 30°C. The relative humidity must be above 50%. For volume under 50 ul, the air humidity must be as high as possible to reduce the effect of evaporation. Special accessories, such as the evaporation trap, are recommended.
Pipetting of Heterogeneous Samples
- Repeat the pipetting step 10 times with minimum volume.
- Again, repeat the pipetting step 10 times with maximum volume.
- Calculate the inaccuracy (A) and imprecision (CV) for both the cases.
- Compare the result to the limits given in the table.
- If the calculated results are within the selected limits, the adjustments of the micropipette are correct.
Single Channel Variable Volume Micropipette
| Range | Volume (ul) | Inaccuracy | Imprecision | ||
| ±% | ±ul | ±% | ±ul | ||
| 0.2-2.0 ul | 2 | 2 | 0.04 | 1.2 | 0.024 |
| 0.5-10 ul | 10 | 1 | 0.1 | 0.5 | 0.05 |
| 2-20 ul | 20 | 0.8 | 0.16 | 0.4 | 0.08 |
| 5-50 ul | 50 | 0.8 | 0.4 | 0.4 | 0.2 |
| 10-100 ul | 100 | 0.6 | 0.6 | 0.2 | 0.2 |
| 20-200 ul | 200 | 0.6 | 1.2 | 0.2 | 1.4 |
| 100-1000 ul | 1000 | 0.6 | 6 | 0.2 | 2 |
| 500-5000 ul | 5000 | 0.6 | 30 | 0.2 | 10 |
| 1000-10000 ul | 10000 | 0.6 | 60 | 0.2 | 20 |
Single Channel Fixed Volume Micropipette
| Volume (ul) | Inaccuracy | Imprecision | ||
| ±% | ±ul | ±% | ±ul | |
| 1 | 5 | 0.05 | 5 | 0.05 |
| 2 | 4 | 0.08 | 2 | 0.04 |
| 5 | 2 | 0.1 | 1 | 0.05 |
| 10 | 1 | 0.1 | 0.5 | 0.05 |
| 20 | 0.8 | 0.16 | 0.4 | 0.08 |
| 25 | 0.8 | 0.2 | 0.4 | 0.1 |
| 50 | 0.8 | 0.4 | 0.4 | 0.2 |
| 100 | 0.6 | 0.6 | 0.2 | 0.2 |
| 200 | 0.6 | 1.2 | 0.2 | 1.4 |
| 200 | 0.6 | 1.2 | 0.2 | 1.4 |
| 250 | 0.6 | 1.5 | 0.2 | 1.5 |
| 500 | 0.6 | 3 | 0.2 | 1 |
| 1000 | 0.6 | 6 | 0.2 | 2 |
| 2000 | 0.6 | 12 | 0.2 | 4 |
| 5000 | 0.6 | 30 | 0.2 | 10 |
| 10000 | 0.4 | 40 | 0.2 | 20 |
Multichannel Micropipettes
| Range | Volume (ul) | Inaccuracy (±%) | Imprecision (±%) |
| 0.5-10 ul | 1 | 16 | 10 |
| 5 | 3.2 | 2 | |
| 10 | 1.6 | 1 | |
| 02-20 ul | 2 | 8 | 4 |
| 10 | 1.6 | 0.8 | |
| 20 | 0.8 | 0.4 | |
| 05-50 ul | 5 | 8 | 4 |
| 25 | 1.6 | 0.8 | |
| 50 | 0.8 | 0.4 | |
| 10-100 ul | 10 | 8 | 3 |
| 50 | 1.6 | 0.6 | |
| 100 | 0.8 | 0.3 | |
| 20-200 ul | 20 | 8 | 3 |
| 100 | 1.6 | 0.6 | |
| 200 | 0.8 | 0.3 | |
| 40-300 ul | 40 | 8 | 3 |
| 150 | 1.6 | 0.6 | |
| 300 | 0.8 | 0.3 |
13. Adjustment
Adjustment is done with a service tool
- Place the service tool into the openings of the calibration nut at the top of the handle.
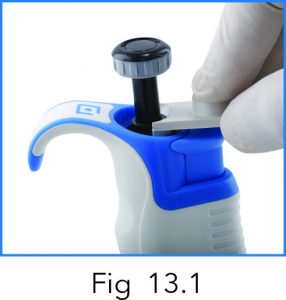
- Turn the service tool clockwise to increase, or counter-clockwise to decrease the volume.
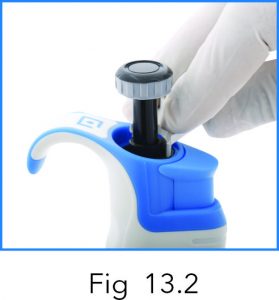
- After adjustment, check the calibration according to the instructions given in the above section.
The formula for calculating results
- Conversion of mass to volume
V= (w+e) x Z
where,
v = volume (ul),
w = weight (mg),
e = evaporation loss (mg), and
z = conversion factor for ul/mg.
- Evaporation loss can be significant with low volume. To determine the loss of mass, dispense water to the weighing vessel.
Note the reading and start a stopwatch. See how much the reading decreases in
30 seconds (i.e. 6mg = 0.2 mg/s).
Compare this to the pipetting time from taring to reading. Typically, the pipetting time might be 10 seconds and the mass loss is 2 mg (10 s x 0.2 mg/s) in this example.
If an evaporation trap or lid on the vessel is used, the correction of evaporation is usually unnecessary. Factor Z is for converting the weight of the water; its value is 1.0032 ul/mg at 22°C and 95 kPa.
Refer to the conversion table.
| Temperature°C | kPa Air Pressure | ||||||
| 80 | 85 | 90 | 95 | 100 | 101.3 | 105 | |
| 15 | 1.0017 | 1.0018 | 1.0019 | 1.0019 | 1.002 | 1.002 | 1.002 |
| 15.5 | 1.0018 | 1.0019 | 1.0019 | 1.002 | 1.002 | 1.002 | 1.0021 |
| 16 | 1.0019 | 1.002 | 1.002 | 1.0021 | 1.0021 | 1.0021 | 1.0022 |
| 16.5 | 1.002 | 1.002 | 1.0021 | 1.0021 | 1.0022 | 1.0022 | 1.0022 |
| 17 | 1.0021 | 1.0022 | 1.0022 | 1.0022 | 1.0023 | 1.0023 | 1.0023 |
| 17.5 | 1.0022 | 1.0022 | 1.0023 | 1.0023 | 1.0024 | 1.0024 | 1.0024 |
| 18 | 1.0022 | 1.0023 | 1.0023 | 1.0024 | 1.0025 | 1.0025 | 1.0025 |
| 18.5 | 1.0023 | 1.0023 | 1.0024 | 1.0025 | 1.0025 | 1.0026 | 1.0026 |
| 19 | 1.0024 | 1.0025 | 1.0025 | 1.0026 | 1.0026 | 1.0027 | 1.0027 |
| 19.5 | 1.0025 | 1.0026 | 1.0026 | 1.0027 | 1.0027 | 1.0028 | 1.0028 |
| 20 | 1.0026 | 1.0027 | 1.0027 | 1.0028 | 1.0028 | 1.0029 | 1.0029 |
| 20.5 | 1.0027 | 1.0028 | 1.0028 | 1.0029 | 1.0029 | 1.003 | 1.003 |
| 21 | 1.0028 | 1.0029 | 1.0029 | 1.003 | 1.0031 | 1.0031 | 1.0031 |
| 21.5 | 1.003 | 1.0031 | 1.0031 | 1.0031 | 1.0032 | 1.0032 | 1.0032 |
| 22 | 1.0031 | 1.0032 | 1.0032 | 1.0032 | 1.0033 | 1.0033 | 1.0033 |
| 22.5 | 1.0032 | 1.0033 | 1.0033 | 1.0033 | 1.0034 | 1.0034 | 1.0034 |
| 23 | 1.0033 | 1.0034 | 1.0034 | 1.0034 | 1.0035 | 1.0035 | 1.0036 |
| 23.5 | 1.0034 | 1.0035 | 1.0035 | 1.0036 | 1.0036 | 1.0036 | 1.0037 |
| 24 | 1.0035 | 1.0036 | 1.0036 | 1.0037 | 1.0037 | 1.0038 | 1.0038 |
| 24.5 | 1.0037 | 1.0038 | 1.0038 | 1.0038 | 1.0039 | 1.0039 | 1.0039 |
| 25 | 1.0038 | 1.0039 | 1.0039 | 1.0039 | 1.004 | 1.004 | 1.004 |
| 25.5 | 1.0039 | 1.004 | 1.004 | 1.0041 | 1.0041 | 1.0041 | 1.0042 |
| 26 | 1.004 | 1.0041 | 1.0041 | 1.0042 | 1.0042 | 1.0043 | 1.0043 |
| 26.5 | 1.0042 | 1.0043 | 1.0043 | 1.0043 | 1.0044 | 1.0044 | 1.0044 |
| 27 | 1.0043 | 1.0044 | 1.0044 | 1.0045 | 1.0045 | 1.0045 | 1.0046 |
| 27.5 | 1.0045 | 1.0046 | 1.0046 | 1.0046 | 1.0047 | 1.0047 | 1.0047 |
| 28 | 1.0046 | 1.0047 | 1.0047 | 1.0047 | 1.0048 | 1.0048 | 1.0048 |
| 28.5 | 1.0048 | 1.0048 | 1.0048 | 1.0049 | 1.0049 | 1.005 | 1.005 |
| 29 | 1.0049 | 1.005 | 1.005 | 1.005 | 1.0051 | 1.0051 | 1.0051 |
| 29.5 | 1.0051 | 1.0051 | 1.0051 | 1.0052 | 1.0052 | 1.0052 | 1.0052 |
| 30 | 1.0052 | 1.0053 | 1.0053 | 1.0053 | 1.0054 | 1.0054 | 1.0054 |
14. Inaccuracy (Systematic Error)
Inaccuracy is the difference between the dispensed volume and the selected volume of a pipette.
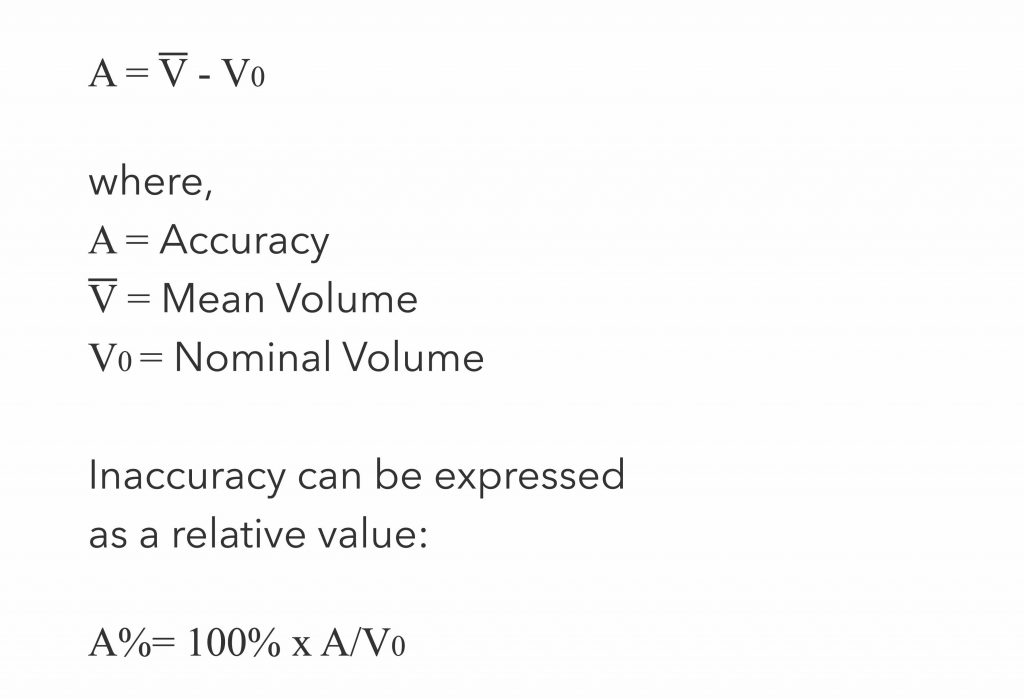 |
Imprecision (random error) – Imprecision refers to the repeatability of the pipetting. It is expressed as the standard deviation (s) or coefficient of variation (CV).
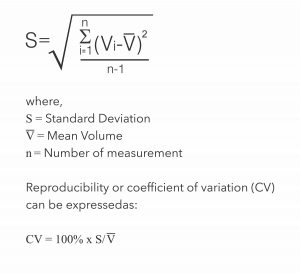 |
15. Maintenance
- When the micropipette is not in use, make sure that it is stored in an upright position.
- We recommend a stand for this purpose.
16. Short-Term Service
- The micropipette must be checked at the beginning of each day for dust and dirt on the outer surface. Particular attention must be paid to the Tip Cone.
- No other solvents except 70% ethanol must be used to clean the micropipette.
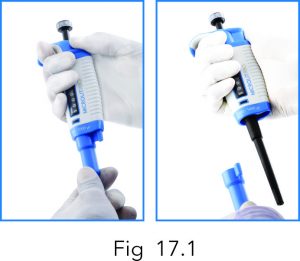
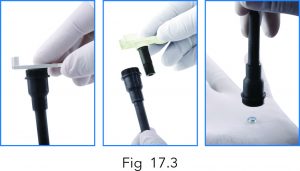
17. Long-Term Service
- If a micropipette is used daily, it must be checked every three months.
- The servicing procedure starts with its disassembly.
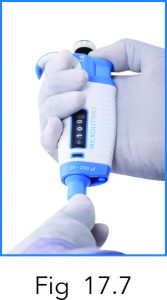
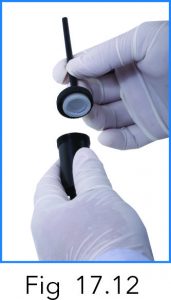
Disassembly
(For Single Channel Variable Volume Ranges 0.2 ul to 200 ul & Fixed Volume Micropipette)
-
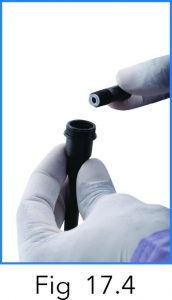
- Press the tip ejector button and pull the ejector out.
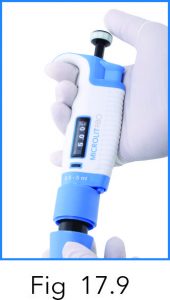
- Turn the Tip Cone counterclockwise to unscrew.

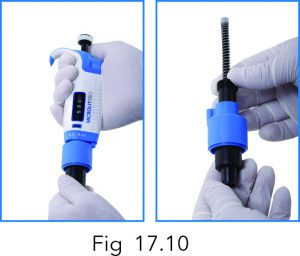
- Fix the service tool on the O-ring seat and turn it clockwise to open.
Pull out the O-ring seat and turn the Tip Cone upside down and retrieve the O-ring.
- Clean the Tip Cone.
- Grease the cleaned parts with a lubricant, preferably silicon grease.
- Press the tip ejector button and pull the ejector out.
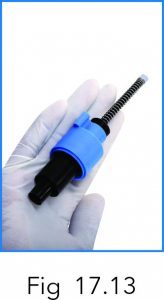
Reassembly
(For Single Channel Variable Volume Ranges 0.2 ul to 200 ul & Fixed Volume Micropipette)
-
- Place the O-ring in the Tip Cone and screw the O-ring seat with help of a service tool.
- Place the spring on the piston and slide it inside the Tip Cone.
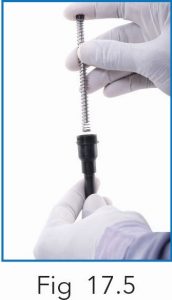
- Screw the assembled Tip Cone on the main housing.
- Slide the tip ejector on the Tip Cone.
- Press to fit the tip ejector.

- Place the O-ring in the Tip Cone and screw the O-ring seat with help of a service tool.
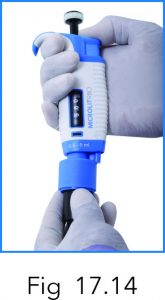
Disassembly
(For Single Channel Variable Volume & Fixed Volume Micropipettes in the ranges 0.5-5 ml and 1-10 ml)
-
- Pull the lower position of the ejector to disengage it from the upper portion.
- Unscrew the Tip Cone from the main housing.
- The Tip Cone is in two portions; the lower portion can be unscrewed from the upper
the portion to expose the piston.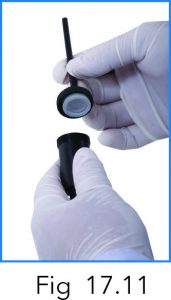
- Grease the cleaned parts with a lubricant, preferably Silicon Grease.
- Pull the lower position of the ejector to disengage it from the upper portion.
Reassembly
(For Single Channel Variable Volume & Fixed Volume Micropipettes in the ranges 0.5-5 ml and 1-10 ml)
-
- Screw back the lower portion of the Tip Cone on the upper part of tip cone.
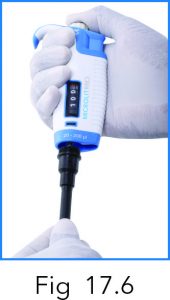
- Now place and screw back the spring shaft in the pipette housing by aligning the tip ejector top with the ejector pin.
- Press fit the ejector top in the ejector pin firmly.
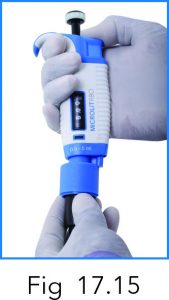
- Press fit the ejector bottom.
- Screw back the lower portion of the Tip Cone on the upper part of tip cone.
18. Performance Optimization
| Activity | Action |
| Consistent Technique | Pipette with a consistent rhythm, pressure and speed. |
| Tip Size and Fit | Use the proper size tip, firmly placed on Tip Cone. |
| Pre-rinse Tips | Pre-rinse pipette tips for improved precision. |
| Sample Aspiration | Keep the disposable tip immersed in fluid during aspiration. Do not let the plunger snap back to starting position. |
| Immersion Depth | Maintain an immersion depth of 2 to 4 mm. |
| Viscous Samples | Aspirate slowly. If bubbles are observed, resample. Volume errors may still occur. Refer to the Calibration section. |
| Acid Samples | Pipetting strong acids and corrosive solutions is not recommended. These liquids may damage the piston and seal. |
| High Vapor Pressure Samples | Pipetting solutions with high vapor pressure is not recommended. These liquids may damage the piston and seal. |
| Sample Temperature | Fluids at a temperature other than that for which the pipette and pipette tips have been calibrated may result in volume measurement errors. |
| Storage | Store upright in a stand. Do not lay the pipette on its side with fluid in the tip. Fluid reaching the piston causes contamination and possible corrosion. |
| Cleaning Piston | Wipe the piston with alcohol and a soft, lint-free cloth. Dry and lightly lubricate the piston. |
| Performance Checks | Check the accuracy and precision of your pipette every 3-6 months depending on use and the samples aspirated. |
19. Sterilization
- The micropipettes can be sterilized by autoclaving them at 121°C (252°F) at 2ata for a minimum of 20 minutes.
- No special preparation is needed.
- You may use stream sterilization bags if needed. After autoclaving, the micropipette must be cooled to room temperature for at least two hours. Before pipetting, make sure that the instrument is dry.
- We recommend that you check the calibration after every sterilization cycle to achieve the best possible precision and accuracy.
20. Troubleshooting
The table below lists possible problems and their solutions.
Single Channel Micropipettes
| Problem | Possible Reason | Proposed Action |
| Liquid is leaking from the pipette tip. |
The pipette tip does not fit properly onto the tip cone. | Use the appropriate tip for exact tip fitment. |
| The liquid being pipetted is hot or cold. The liquid being pipetted is very dense or viscous. | Shorten the amount of time the liquid is in the tip, or the possible solution is to use the reverse mode of pipetting. | |
| Pipette sealing O ring is worn. | Replace the sealing O ring. | |
| The tip is not loaded to maintain the seal. | Press on the tip more firmly. (Avoid using too much force and over inserting the tip) |
|
| Amount of sample delivered is not accurate. |
The pipette is not within calibration specifications. | Re-calibrate the pipette as per the operation Manual. |
| Improper pipette technique. | See suggestions for improving pipetting technique and results. |
Multihannel Micropipettes
| Problem | Possible Reason | Proposed Action |
| Liquid is leaking from the pipette tip. |
The pipette tip does not fit properly onto the tip cone. | Use the appropriate tip for exact tip fitment. |
| The liquid being pipetted is hot or cold. The liquid being pipetted is very dense or viscous. | Shorten the amount of time the liquid is in the tip, or the possible solution is to use the reverse mode of pipetting. | |
| Foreign particles between the tip and Tip Cone. | Clean the Tip Cone with a lint-free cloth and attach new tips. | |
| The tip is not loaded to maintain the seal. | Press on the tip more firmly. (Avoid using too much force and over inserting the tip) |
|
| Amount of sample delivered is not accurate. |
The pipette is not within calibration specifications. | Re-calibrate the pipette as per the operation Manual. |
| Improper pipette technique. | See suggestions for improving pipetting technique and results. |
21. Package
The micropipettes are shipped in specially designed packages containing the following items.
Single Channel Micropipettes
- The Micropipette
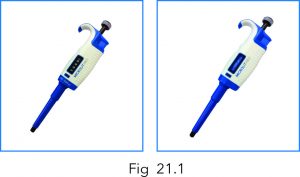
- Service Tool

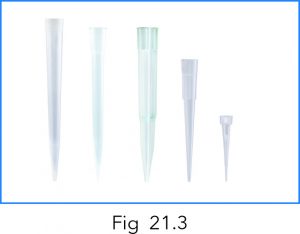
- Tip Sample
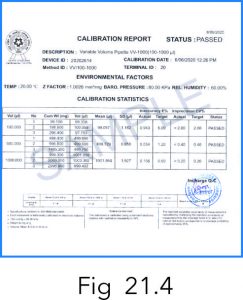
- Calibration Certificate
- Shelf Hanger
- Operation Manual
Multichannel Micropipettes
- The Micropipette
- Service Tool (Fig. 21.2)
- Tip Sample
- Calibration Certificate (Fig. 21.4)
- Shelf Hanger (Fig. 21.5)
- Reagent Trough
- Operation Manual
22. Caution
The micropipettes are designed to allow easy in-lab service. If you would prefer to have us or your local representative service your instrument, please make sure it has been decontaminated before you send it to us.
Please note that the postal authorities in your country may prohibit or restrict the shipment of contaminated material by mail.
You can also download the Micropipette Micropipette product manual by clicking on the link.