• Multiple Offers
    Multiple Offers
  • Support
    Real-Time Support
  • Free Replacement
    1-Year Free Replacement Warranty
  • (732) 321-0852

What is the History of Micropipettes?

Introduction

Micropipette
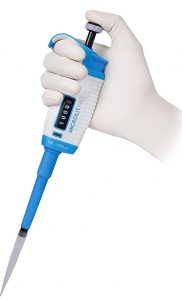
Micropipettes are an indispensable part of any scientific research laboratory. Today, they are used in almost every scientific / research experiment. The instrument has made the life of scientific community all over the world very convenient. But have you ever wondered about a micropipette’s history? How was it invented and how did scientists handle their experiments prior to its invention? Let’s take a look at the history and gradual evolution of this remarkable scientific instrument.

 Louis Pasteur Invents the Glass Pipette

It all began when French chemist and microbiologist Louis Pasteur invented the first ever pipette during the 1940s. He is known as the ‘Father of Medical Microbiology’ given his remarkable contributions in the field. One of such contributions was developing a glass pipette for transfer of liquids in the lab. A glass pipette is a handheld device, which helps to simplify the transfer process of liquids, while also reducing the risk of contamination.

Heinrich Schnitger Develops the Prototype of Micropipette

Building on Pasteur’s invention, German physician Heinrich Schnitger created the first micropipette prototype in the 1950s. Heinrich Schnitger, a soldier during the World War II, suffered from tuberculosis, which led him to study medicine. When he was 32 years old, Heinrich started working as a post-doc with Theodor Bücher, Director of the Institute of Physiological Chemistry at the University of Marburg, Germany.

Heinrich Schnitger

During that time, it was a common practice to pipette liquids through mouth using glass pipettes. Schnitger began the project of measuring phosphate-containing metabolites by applying the anion exchange chromatography. The study involved using approximately 80% formic acid and other harmful chemicals, which had to be collected in volumes less than a millilitre for subsequent analysis.

During his studies, he felt frustrated with the process of pipetting small volumes repeatedly through glass micropipettes. Schnitger decided to develop a prototype of a similar instrument with a removable plastic tip and a spring-loaded piston. In a span of few weeks, Schnitger was able to develop a piston-driven pumping device, which was a potential replacement for the gravity-based pipetting system.

In his first attempt, Schnitger used a tuberculin syringe and added a spring to its piston. In addition, he added an upward stop to control the liquid volume to be dispensed. Then, he replaced the needle of the syringe with a polyethylene tip, extracted from a polyethylene tubing. This is how, in the year 1957, Heinrich Schnitger invented the first ever micropipette at University of Marburg, Germany. The prototype consisted of majority of the features existing in today’s version of micropipette.

Bücher saw a huge potential in this device, and he insisted that Schnitger should continue his efforts in developing the device further. Schnitger worked in the institute’s advanced mechanical workshop, set up by Bücher. Based on the prototypes created by him, the lab technicians were able to create copies of the device for lab use.

Micropipette Revolutionizes Medical and Biochemical Research

Later, Schnitger went on adding different mechanical measures for accurate and easier repetitive pipetting. One of the major breakthroughs in the process was introducing a second spring in the design, which enabled the piston to release any residual fluid from the tip. The instrument had an air buffer that separated the liquid and the piston. It also helped the liquid confine to the polyethylene tip. In order to completely release the liquid, the user applies optimum pressure that pushes the second spring connected to the lower stop.

The design of the equipment was simple, yet elegant and efficient. The well-crafted features of the device tremendously impressed the scientific community. The micropipette significantly reduced the time taken in execution of an experiment, along with making the experiments much more convenient. Researchers were able to pipette more number of samples with high speed and accuracy, specially very small volumes. The invention revolutionized micro-volume liquid transfer, and with it, the field of biochemical, biological and medical sciences.

Six months after the invention, Schnitger applied for a patent of his product in Germany by using the first prototype he built. His application, dated May 1957, entitled “Vorrichtung zum schnellen und exakten Pipettieren kleiner Flüssigkeitsmengen” (Device for the fast and exact pipetting of small liquid volumes), received an approval on 24 April 1961.

Eppendorf Purchases Rights to Mass Production of Micropipettes

in the 1960s, Germany-based biotech firm Eppendorf bought the rights to the micropipette and started the mass manufacturing of the product. Due to this, the cost of the micropipette was reduced significantly, making it available to everyone on a global scale.

Adjustable Micropipette Gets Invented

In the1970s, micropipettes were improved even further by Wisconsin, US based scientists Warren Gilson and Henry Lardy. They created an adjustable format of the micropipette. This feature enabled users to adjust liquid volumes as per the requirement of the experiment.

Modern Micropipette and the Path Forward

21st century saw the reinvention of micropipettes as unimaginable strides in technology were made. Through the years, scientists have sought to overcome any limitation associated with the micropipette design. Highly advanced and automated models of the device have surfaced over the years, including the Electronic Pipette, Adjustable Spacer Multichannel Pipette and Bluetooth-enabled Micropipette have become the most remarkable lab instruments in liquid handling scientific research. Recently, it has been estimated that the global market value of disposable pipette tips is likely to be over USD 166 million by 2028, representing a CAGR of 9.5%.

In the same series, Microlit joined the liquid handling category in 1991. Over time, Microlit developed the most advanced and remarkable products range like Micrpipette, Bottletop Dispensers, E-Burette, Pipette Filler, Lilpets and solved most of the difficulties of overpricing, accuracy and instrument handling issues. Its technology and design have been awarded and appreciated by many certification authorities like CII, ISO, CE etc. In 2018, Microlit USA was launched to bring this innovation and exceptional service to laboratories in the Western market. Microlit products are highly recommended for Molecular biology, Microbiology, Immunology, cell culture, Analytical Chemistry, Biochemistry, Genetics etc.

Pipettes have come a long way since the invention of Louis Pasteur and Heinrich Schnitger. They are now an instrument of critical importance in scientific research labs all over the world.

Role of Recirculation Valves in Dispensers

What is a re-circulation valve?

In lab experiments involving bottle top dispensers, a recirculating valve component can play a key role. A recirculating valve is used to redirect the flow of a liquid into the bottle to eliminate any bubbles or loss of reagent.

Beatus1

The conventional configuration of a dispenser includes a calibration scale (used to measure the amount of liquid to be dispensed), a piston cylinder (used to facilitate transport of the reagent in and out of the bottle knob), an outer dispensing tube (linked to the spout for the purpose of dispensing the liquid out of the bottle) and an inner recirculation tube (used to recirculate the liquid back into the bottle). When the dispenser is operating in a recirculating mode, the recirculating tube creates a link with an interconnecting region through a pair of notches, in order to recirculate the liquid into the bottle.

As the liquid substances used in pharmaceutical and clinical laboratories can be extremely costly, it is important to prevent any wastage of the liquid caused due to air purging. In addition, as the liquids can be corrosive and explosive, it can be harmful for the lab worker if they spill out. Therefore, a dispenser having a built-in recirculation feature that prevents any unnecessary liquid wastage and purging is highly important.

How does a recirculation valve work in bottle-top dispensers?

One of the most common techniques for preventing the purging of the liquid is to continuously recirculate it between the dispensing cycles. A typical recirculating valve comprises four ports: two inlet ports for components A and B, and two return ports for components A and B (present on either side of the valve).
Cross Section 1

Typically, these recirculation valves can be rotated between two different positions, the first position enables dispensing of the liquid from the tip. On the other hand, when switched to the second position, the liquid re-circulates through the spout back into the bottle. Depending on the position of the valve, the recirculation valve can have different dispense and recirculate channels.

Whenever the system is in the dispensing mode, the mixing valve gets opened to enable the components to run through the static mixing nozzle. After the valve gets closed, the components keep recirculating within the valve and into their own holding vessels, which means that there is no dead volume and no problem of stagnation.

Bottle top dispenser working

Not only a recirculating valve prevents waste from accumulating within the system, it helps in eliminating pressure to get built up inside the supply lines, which might result in an undesirable surge after the valve is opened, as well as lead to an off-ratio mix. Certain recirculating mix valves are designed to include a snuff-back feature to prevent the dripping or oozing of components after the valve gets closed.

Limitations of Dispensers with No Recirculating Valve

In typical configurations of bottle top dispensers, which do not have the feature of recirculation, there can be a number of limitations. For instance, in order to dispense the accurate volume of liquid, the cylinder needs to be completely filled with the reagent and the air has to be eliminated from the path of the liquid. In case, the air is not removed completely, air bubbles get formed, and after the process, a certain amount of liquid might remain in the spout, and at times, inside the cylinder, which needs to be drained out. has to be discarded or drained out. This leads to a considerable wastage of the liquid. Whereas in a bottle top dispenser having recirculation valves, the cylinder can be complete with the liquid by recirculating the liquid into the bottle, thereby preventing any environmental or accidental hazards along with keeping the expensive chemicals from getting wasted.

Microlit Beatus Bottle top dispenser with Recirculation Valve Technology

Recirculation Valve

Microlit’s Bottle top dispenser, Beatus is power packed with a dual-mode re-circulation valve, which enables priming of the instrument without any loss of liquid. It is highly compatible with a variety of chemicals and can be autoclaved easily. The recirculation valve helps in re-directing the liquid reagent into the mounted bottle, thereby, preventing any unnecessary wastage while purging. The dispenser facilitates smooth and bubble-free dispensing.

The device also comes with FlexiNozzle™ technology, an adjustable delivery nozzle, which offers higher flexibility and enables effortless dispensing in difficult laboratory environments. Beatus has an ergonomic and intuitive design, which allows for greater precision in a practical laboratory.

The instrument has numerous applications in the field of pharmaceuticals, academic research, food & beverages for dispensing corrosive acids, solvents and other reagents. It may also be used as an e-liquid bottle dispenser, Vape liquid dispenser, Hemp Oil dispenser and an essential oils bottle dispenser.

It conforms to ISO 8655 standards and is ISO 9001, ISO 13485, ISO 17025, CE certified equipment.

To know more about Microlit BTDs and how they can improve your productivity levels, no matter which industry you are a part of, click here.

What is the right liquid handling device for your lab?

With a myriad of liquid handling devices available in the market ranging from a simple pipette to a full-scale automated workstation, making the right choice can be daunting. According to Kay Chang, the Product Manager of Liquid Handling at Blue-Ray Biotech, one should consider certain key specifications while buying a liquid-handling solution:

  • Size
  • Throughput
  • Channel Number
  • Labware Compatibility
  • Accuracy and Precision
  • Volume Range

However, the importance of other factors, such as cost, ergonomics and extent of automation should not be overlooked. Begin by asking the following basic questions:

  1. Does your lab have enough room to install the proposed system? You should check with the manufacturer if they can offer the same equipment in a reduced size and compact footprint.
  2. Will you be able to upgrade the system in case of increased volume requirements?
  3. What are the required levels of speed, accuracy, volume and precision?
  4. How many plates need to be processed every week?
  5. In case of an automated system, how versatile and user-friendly is the associated software?
  6. In case of a manual liquid-handling equipment, how ergonomic is the device?

Types of Liquid Handling Devices

  1. Manual Pipettes: A manual pipette is a handheld device for accurately measuring and dispensing low liquid volumes. Manual pipettes find application in the field of life sciences, biotechnology and pharmaceuticals.
  2. Electronic Pipettes: Electronic pipettes consist of a motor component, which is used for regulating aspiration and rate of dispensing in order to reduce the formation of air bubbles and prevent barrel contamination. In addition, using electronic pipettes minimize measurement errors in studies, wherein pipetting is performed repeatedly as these pipettes are often programmable.
  3. Bottle Top Dispensers: A bottle top dispenser is used to dispense highly specific quantities of liquids (generally between 1ml and 100 ml), including chemicals, solvents and oils from bottles or similar containers. Using a bottle top dispenser can help in reducing loss of reagents and increasing efficiency.
  4. Pipette Tips: A pipette tip is a disposable and autoclavable cone-shaped attachment of a pipette, which facilitates the transfer of liquids. Pipette tips are available in a variety of formats, including pre-sterilized, non-sterile and filtered tips.
  5. Burettes: Burettes are graduated glass tubes, which are used to dispense small liquid volumes, dropwise, especially in titration experiments. The long, glass tube has a tap at its end, used to carefully add liquid drops to a solution. Burettes are available both in manual and digital formats.
  6. Pipette Fillers: Pipette fillers are lab instruments used to fill and drain pipettes by suction / pressure. They help in filling and dispensing liquids from pipettes in an extremely controlled manner.

Automated Liquid Handlers: Presently, lab workflows are highly complex and time intensive. At times, the operations involve very minute reagent volumes, and therefore, the quality of liquid transfer needs to be controlled efficiently. Due to this, automated systems have become extremely popular, as they can be optimized for a number of techniques, such as nucleic acid preparation, next-generation sequencing, TLC spotting, ELISA, PCR setup and liquid–liquid extraction.

You need to evaluate the degree of automation required for your operations to run seamlessly. In an automated liquid handler, software applications control almost all the operations of the device. Certain liquid handlers come with pre-scripted protocols for particular assays, and users are able to adjust the settings as required. One can also hire staff having advanced programming skills to design customized protocols.

You should also assess if the budget can be extended to include a semi / full automation system. This can drastically reduce the cost of reagents and operator hours.

Liquid Handling Applications

Liquid handling equipment is used across a wide variety of biological applications, such as molecular biology, drug discovery and development, forensics and materials science.

  • Drug Development

Recent advancements in the domain of drug development are coupled with advances in liquid handling equipment and protocols. Various laboratories are now moving away from manual operations and integrating automation in their workflows through the use of high throughput workstations.

“Automation is critical to the modern drug discovery laboratory because it increases the speed and accuracy of tests, saves time, and allows the scientist to focus on science and not manual tasks. The ability to do half a million test points in one day has opened up new strategies in exploring drugs”, states Kevin Hrusovsky, CEO of US-based company, Caliper Life Sciences.

  • Food and Beverage Analysis

Liquid handling is critical not only in assessing the nutritional value of food and beverages, it is also fundamental to testing toxins and contaminants present in them.  Various manufacturers have recently opted for electronic pipettes to accelerate their laboratory workflows. Certain laboratories also use liquid handling equipment for detection of food-borne viruses.

  • Sample Preparation for Mass Spectrometry

Mass Spectrometry experiments have been transformed completely by the use of robotic liquid handling systems, which have significantly altered the way MS samples are prepared. These systems have allowed laboratories to work smarter and quicker. As per a recent report published in the journal Analytical Sciences, robotic liquid handling systems have the ability to enhance the throughput of an experiment by almost 100 samples.

  • Next-generation sequencing (NGS)

Automated liquid handling systems have offered scientists a faster, easier and cost-effective way to prepare NGS samples, as well as sustain the desired high-throughput workflow. Robotic liquid-handling devices greatly enhance the capacity of NGS workflows to run independently with improved performance and precision.

“Automatic liquid-handling systems have the potential to significantly optimize genome sequencing outputs, both in time and costs. As the needs of biological laboratories become clearer, the properties of these pipetting robots also evolve,” according to a report published in the journal BMC Genomics.

Liquid handling Trends

Currently, manufacturers are focusing on using semi-automated systems to enable automation of labs with limited budgets that don’t permit end-to-end automation. Such systems operate through push buttons, thus offering a higher level of ease-of-use and flexibility than a manual pipette. In addition, Artificial intelligence (AI) is changing the way modern labs function. The current focus is on enhancing process security features in order to fulfill the increasing regulatory requirements. Such software updates usually need to be tweaked for appropriate customization of protocols without any compromise in capability.

The primary limitations associated with liquid handling systems are reliability and reproducibility. The devices need to be efficient to function well in difficult experimental conditions with minimal downtime and maintenance requirements. One needs to be familiar with the principles, strengths and weaknesses of the equipment in order to prevent undesirable results.

Fundamentals of RNA Sequencing

RNA-sequencing (RNA-seq) is a scientific assay that is used to quantify and examine RNA in a biological sample using next-generation sequencing techniques. The process analyzes the transcriptome to identify the state of genes in our DNA, whether they are turned on or off, as well as the degree of gene activation. Let’s take a look at the working principle of this technique, along with its various applications and challenges.

Working Principle of RNA Sequencing

At the outset, RNA sequencing was performed using Sanger sequencing technology, which is not a cost-and time effective technique in current times. Recently, with the advent of next-generation sequencing (NGS) technology, this assay can be performed at low costs without compromising on the overall throughput.

There are several steps involved in an RNA-seq workflow, including:

  • RNA extraction
  • Reverse transcription into cDNA
  • Adapted ligation
  • Amplification
  • Sequencing

1) After the extraction of RNA from a sample, the first step is the conversion of RNA of interest into complementary DNA (cDNA) fragments to form a cDNA library. This step is performed through reverse transcription.

2) This is followed by fragmentation of cDNA, and addition of adapters to these fragments. The adapters consist of functional elements that enable the process of sequencing. For instance, the priming and amplification element. After this step, processes, such as amplification, size selection and clean-up are performed.

3) Then, the cDNA library is examined using NGS, which produces short sequences corresponding to the respective fragment.

The depth of RNA sequencing can vary according to the output data requirements. Sequencing can be performed by either single-end or paired-end sequencing techniques. Single-read sequencing is cheaper and faster as the cDNA fragments are sequenced from only one of the ends. In the paired-end technique, sequencing is performed from both ends, but can prove to be beneficial in post-sequencing data reconstruction.

RNA-seq versus Microarrays

RNA-seq is a highly sophisticated technique and is considered to be relatively better than other technologies, including microarray hybridization. The possible reasons for the superiority of RNA-sequencing over other techniques, include:

1) RNA sequencing is not limited by previously identified genomic sequences. Hybridization-based approaches usually require species specific probes, while RNA sequencing is able to identify novel transcripts from entities which have not been sequenced before.

2) The isolated cDNA sequences can be mapped directly to the specific regions in the genome, making the process less erroneous by eliminating the background signal.

3) In microarray experiments, there can be problems related with cross-hybridization or sub-standard hybridization, which are not a major concern in RNA sequencing experiments.

4) Unlike microarray data results, which are relative values calculated with respect to background signals, RNA sequencing data is absolute and quantifiable.

5) Microarrays are ineffective for detection of extremely high or low transcription levels, which is not an issue with RNA sequencing.

Applications of RNA Sequencing

RNA sequencing is useful in examining and discovering various aspects of the transcriptome, such as the mRNA, rRNA and tRNA content. Unraveling the transcriptome can help us co-relate the information stored in the genome with the functional protein expression. In addition, it has the ability to reveal what genes are activated in the genome, as well as their degree of transcription. These discoveries enable researchers to comprehend a cell’s biology in a better way and identify factors that lead to disease. The most common techniques that use RNA sequencing include single nucleotide polymorphism (SNP) identification RNA editing, differential gene expression analysis and transcriptional profiling.

Challenges and Future Perspectives

Although there have been significant strides in the field of RNA sequencing in the last few years, there are various challenges that remain unaddressed.

RNA sequencing requires isolation of sufficient and high-quality RNA, which leads to disposal of a significant portion of a sample. While the sample quantity requirements have minimized substantially over the years, one needs to ensure that they have isolated sufficient amounts of RNA that can fulfill all their data analysis needs. Poor quality samples usually give unsatisfactory outcomes.

Further, RNA degrades rapidly, therefore, it is vital to handle RNA samples with utmost caution at every step of the process. In order to evaluate a sample’s quality and concentration, UV-visible spectroscopy techniques are used.

In an effort to reduce sequencing costs and enable sequencing of small samples, scientists pool samples before the library preparation step. However, while analyzing data, researchers need to account for this factor, and if there are variations within the pooled samples, it can generate misleading results and cause statistical issues.

Over the decade, there has been significant advancement in the domain of RNA sequencing, which is validated through increased throughput and reduced costs. Currently, the sequence fidelity in the process is much better than earlier available NGS technologies. This is accompanied by wider availability of data analysis tools. However, sequencing technologies still need to be improved in order to obtain sufficient read depth and maximize sequencing capacity to increase the number of biological replicates that can be evaluated to generate meaningful data.

Methods of Decontamination

As per estimates, around 46.5 million surgical and medical procedures are performed in the US every year. All the procedures are performed using sterile medical devices or equipment to eliminate any sort of contamination. For ensuring the safety of such devices/instruments, procedures like disinfection and sterilization are essential prior to use.

In the past, many studies have reported lack of compliance in terms of established guidelines for disinfection and sterilization, resulting in devastating outbreaks. In this regard, it is important that the healthcare, clinical and hospital authorities establish clear guidelines related to the decontamination mechanism of medical instruments, and whether they need to be cleaned, disinfected or sterilized. These terms, although similar, differ from each other in certain ways. Below is a summary of some key differences.

Decontamination

It is an umbrella term used to describe an item or an environment, which is free from micro-organisms, and therefore safe to handle and use. The terms sterilization, disinfection and cleaning are different forms of decontamination.

Sterilization Disinsfection and cleaning

1) Sterilization: The process involves killing of all living micro-organisms including spores. However, toxic substances (pyrogens) and dead microorganisms may continue to persist on the surface of the object. In addition, it is important to note that sterilization is not effective against prions.

Degree of sterilization is calculated using the Sterility Assurance Level, which is the probability of survival of a microorganism after the treatment, which should be less than one in one million.

In a laboratory environment, steam sterilization (also known as autoclaving) is often used to achieve optimal levels of sterilization. Autoclaving is performed with saturated steam under pressure of around 15 psi and at least a temperature of 121°C for a certain period of time. This temperature and pressure setting can rapidly destroy microorganisms and decontaminate any other infectious waste. It is often employed to sterilize laboratory glassware and reagents. For an effective heat transfer using autoclaving, the following points must be considered:

  • The steam should be able to flush out the air present in the autoclave chamber.
  • One needs to check and clean the drain screen present at the bottom of the autoclave chamber. If the drain is blocked, it might result in entrapment of air, which would prevent optimum functioning, and is therefore, critical to achieving sterility.
  • In addition, one needs to ensure that the material to be sterilized is in contact with the steam.
  • Chemical indicators, such as an autoclave tape should also be used with each batch, which can be a useful indicator of efficacy. Autoclave’s sterility levels must also be monitored on a regular basis through suitable biological indicators, such as B. stearothermophilus spore strips, which are placed at different locations inside the autoclave.
  • As spores are highly resistant to heat, each autoclaved container should be spore tested before use.

2) Disinfection

Disinfection is a process of eliminating or destroying the majority, but not all viable organisms. The objective is to minimize the number of microbes to a degree at which they render harmless. However, unlike sterilization, disinfection does not necessarily eliminate spores. Although chemical sterilants have the ability to kill spores with prolonged exposure (3-12 hours).

decontamination and Cleaning

On the other hand, certain kinds of disinfectants, also known as high-level disinfectants are able to kill all kinds of microorganisms except bacterial spores at a similar concentration as chemical sterilants but with shorter exposure time. In addition, low-level disinfectants are able to kill most vegetative bacteria, certain fungi and viruses, and intermediate-level disinfectants can kill vegetative bacteria, mycobacteria, most fungi and viruses, but not necessarily bacterial spores.

Classification of Disinfection

  1. High Level Disinfection
  • This level of disinfection requires high concentrations of chemical germicides, such as concentrated sodium hypochlorite.
  • High level disinfectants are usually used for shorter periods of time (10-30 min) for disinfection, however, they are able to achieve sterilization if they are in contact with the surface for longer periods of time (7-10 hours).
  • This level of disinfection eliminates vegetative microorganisms and inactivates viruses.
  • It should not be used on environmental surfaces, such as lab benches or floors.
  1.  Intermediate Level Disinfection
  • EPA-approved tuberculocidal hospital disinfectants fall into this category.
  • It kills vegetative microorganisms and fungi and renders most viruses inactive.
  • It can be used for disinfecting lab benches, as well as housekeeping. 
  1. Low Level Disinfection
  • It does not kill M. tuberculosis
  • Eliminates most vegetative bacteria, certain fungi, and inactivates some viruses.
  • They are also called ‘hospital disinfectants’ or ‘sanitizers’.

Certain factors, such as prior cleaning of the item, existing organic and inorganic load, type and degree of microbial contamination, physical attributes of the item, biofilm concentration, temperature and pH of the process are crucial to the efficacy of both disinfection and sterilization. These factors must be monitored and evaluated periodically to attain optimal levels of decontamination.