1. Intended Use of the Instrument
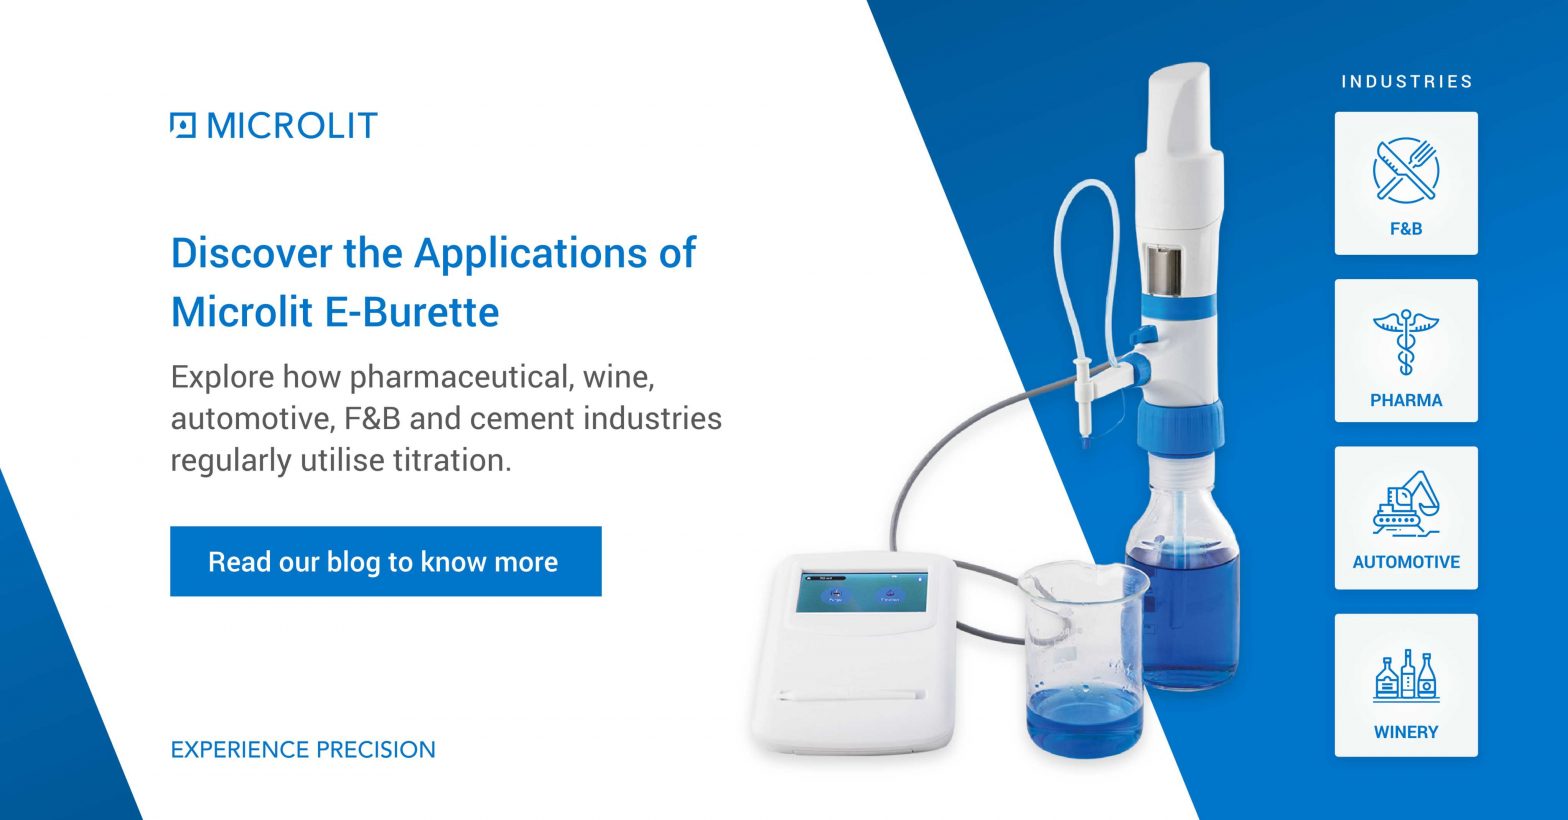
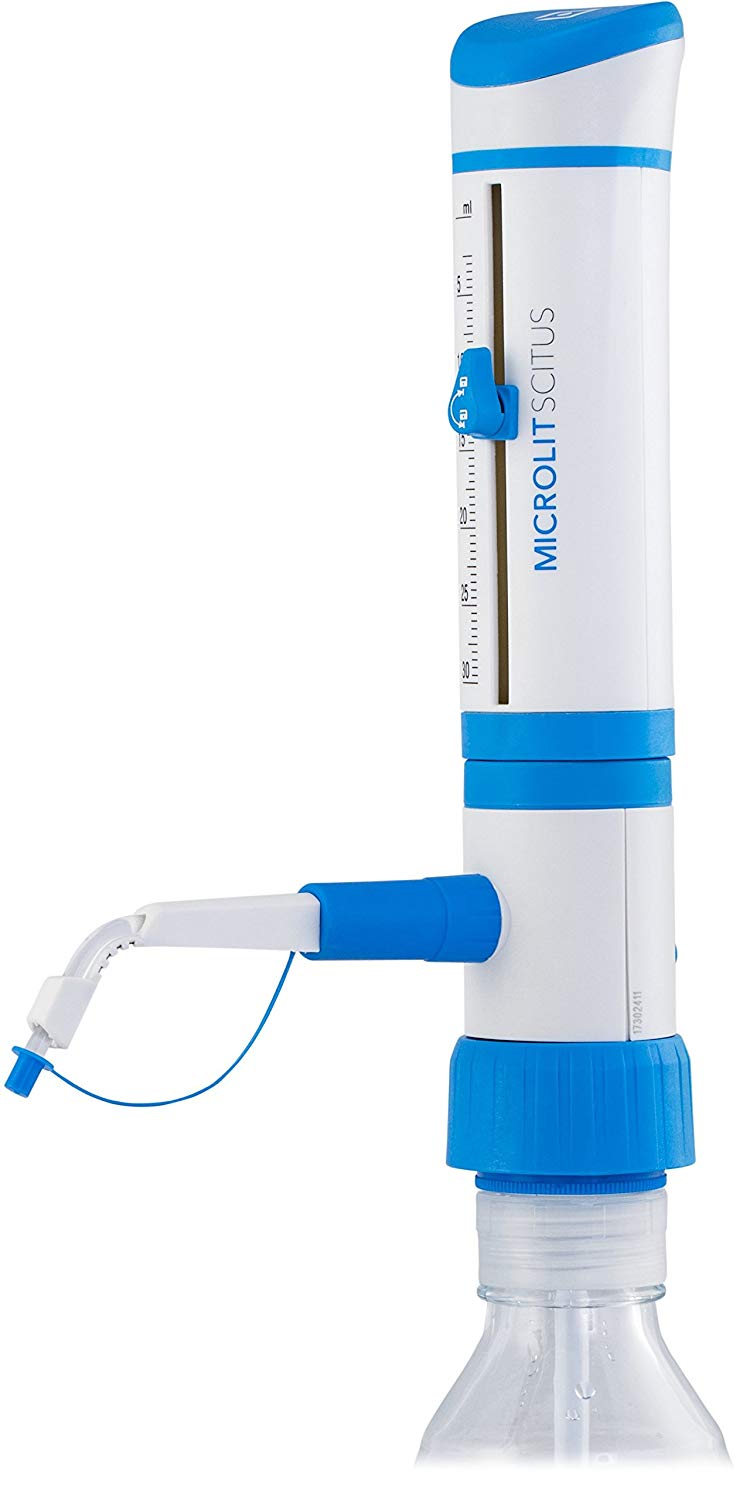
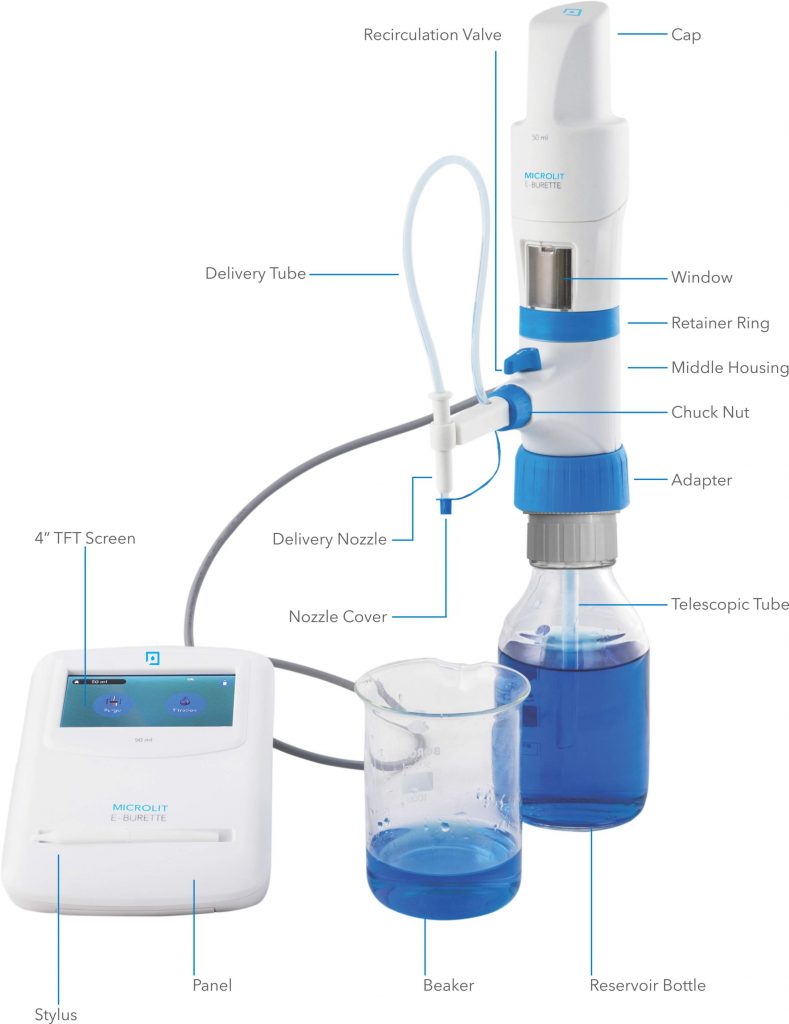
MICROLIT E-BURETTE is a state-of-the-art Motor Operated Burette with sophisticated features and functionality. It is intended for use in laboratories and the field for easy, safe and accurate titrations.
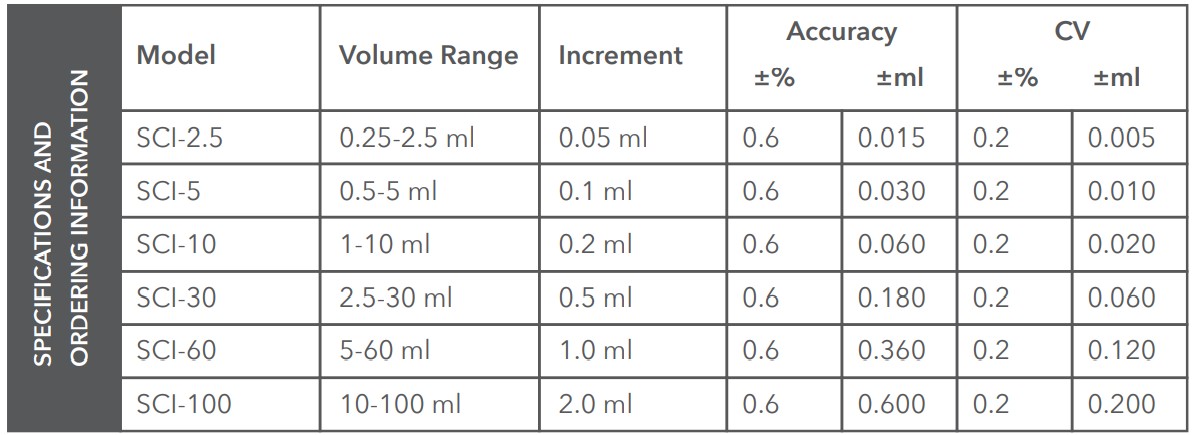
2. Product Specifications
| Performance Data | 10 ml | 25 ml | 50 ml |
| Unit Type | Microprocessor-controlled motorized piston lift system with recirculation valve | ||
| Volume Ranges | 0.005 ml – 99.99 ml (Max piston lift 10 ml, automatic addition) | 0.01 ml – 250 ml (Max piston lift 25 ml, automatic addition) | 0.01 ml – 500 ml (Max piston lift 50 ml, automatic addition) |
| Volume Accuracy | A= 0.2%, CV = 0.07% | A = 0.2%, CV = 0.07% | A= 0.2%, CV = 0.07% |
| Operating Temperature | +10 °C to +40 °C (from 50 °F to 104 °F) | ||
| Power Supply | 18 V, 3 A | ||
| Battery Operation | One complete battery charge gives 3 hours (approx.) of continuous operation, (Battery capacity indicated on TFT display and charging time 6.5 hrs.) | ||
| Quality Control | In compliance with DIN EN ISO 8655-3 | ||
| Touchscreen | 4” TFT screen | ||
| PC Interface | Mini USB Cable | ||
| Languages | Available in 4 languages (English, Spanish, German and French) | ||
3. Safety Instructions
This instrument may sometimes be used for operations involving hazardous materials and equipment. It is beyond the scope of this manual to address all of the potential risks associated with its use in such applications. It is the sole responsibility of the user to consult and establish appropriate safety and health practices and determine the applicability of regulatory limitations, prior to the usage of this instrument.
- Please read the following instructions carefully.
- Read and understand this Operation Manual thoroughly before using the instrument.
- Follow general and safety instructions for hazard prevention. E.g., always wear protective clothing, protective gear for the eyes and hands.
- Carefully observe the specifications provided by reagent manufacturers.
- When dispensing inflammable fluids, avoid the built up of static charge. Make sure that you do not dispense into plastic vessels and do not wipe the instrument/equipment with a dry cloth.
- Use the instrument only for dispensing liquids, with strict regard to the defined limitations of use and operating constraints. (Refer to section 4)
- Observe operating exclusions. When in doubt, contact the manufacturer or supplier.
- Always use the instrument in such a way that neither the user nor any other person is in danger. While dispensing, the discharge tube must always point away from you or any other person. Only dispense into appropriate vessels and avoid splashes.
- Do not press the piston when the discharge tube closure is attached.
- Do not remove the discharge tube while the dispensing cylinder is being filled.
- Reagents can accumulate in the cap of the discharge tube. Thus, clean it regularly.
- Do not carry the mounted instrument by the cylinder sleeve or the valve block. Breakage or loosening of the cylinder may lead to personal injury.
- Use only original accessories and spare parts.
- Do not attempt to make any technical alterations. Do not dismantle the instrument any further than is described in the Operation Manual.
- Always check the instrument for visual damage before use.
- If there is any sign of a potential malfunction (e.g. piston difficult to move, stuck valve or leakage), immediately stop dispensing.
Consult the ‘Troubleshooting’ section of this Operation Manual and contact the manufacturer if needed. (Refer to section 18)
4. Functions and Limitations of Use
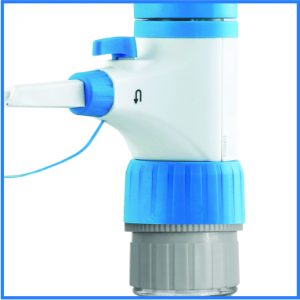
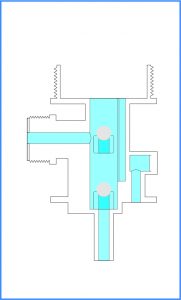
MICROLIT E-BURETTE is designed for dispensing liquids directly from the reservoir bottle. It is calibrated in accordance with the guidelines of the DIN EN ISO 8655–3. When the instrument is correctly used, the dispensed liquid comes into contact with only the following chemically resistant materials: PTFE, FEP and Borosilicate glass.
A. CE Marking:
This sign certifies that the product meets the requirements of the EC directive and has been tested according to the specified test methods.
B. Physical Limits
MICROLIT E-BURETTE is designed for titrating liquids, observing the following physical limits:
- Maintain instrument and reagent between +10 °C to +40 °C (from 50 °F to 104°F).
- Maintain reagent vapor pressure up to 600 mbar (maximum). Aspirate slowly above 300 mbar in order to prevent the liquid from boiling.
- Kinematic viscosity upto 500 mm2/s. (dynamic viscosity [mPas] = kinematic viscosity [mm2 /s] x density [g/cm³])
- Relative air humidity between 20% and 90%.
- Use fluids with density upto 2.2 g/cm³.
C. Operating Limitations
- Chlorinated and fluorinated hydrocarbons or chemical combinations which form deposits may make it difficult for the piston to move or jam it. If the piston becomes too difficult to move, immediately clean the instrument. (Refer to section 17)
- While dispensing inflammable fluids, avoid the built up of static charge. Make sure that you do not dispense into plastic vessels and do not wipe instruments with a dry cloth.
- MICROLIT E-BURETTE is designed for general laboratory applications and complies with relevant standards, like DIN EN ISO 8655-3. Please check the compatibility of the instrument for a specific application (e.g. trace material analysis, food sector etc.). Approvals for specific applications, like production and administration of food, pharmaceuticals and cosmetics are not available.
5. Operating Exclusions
- Do not use the instrument with:
- Liquids that attack FEP, PFA and PTFE (e.g. dissolved Sodium Azide*).
- Liquids that attack borosilicate glass (e.g. Hydrofluoric acid).
- Hydrochloric acid > 40% and Nitric acid >70%.
- Tetrahydrofuran or Oxolane.
- Trifluoroacetic acid.
- Explosive liquids (e.g. Carbon Disulfide).
- Suspensions (e.g. of charcoal) as the solid particles may clog or
damage the instrument. - Liquids that attack PP (cap).
- An aggressive atmosphere, e.g. HCl fumes.
* The permissible concentration of dissolved Sodium Azide is not more than 0.1%
6. Storage Conditions
Store the instrument and accessories in a clean, cool and dry place. Storage temperature from –20 °C to +50 °C (from –4 °F to 122 °F) is advised with relative humidity between 5% and 95%.
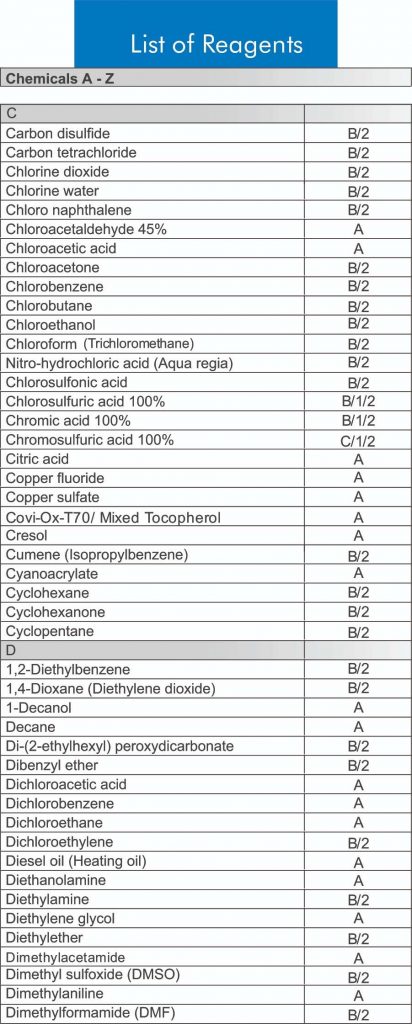
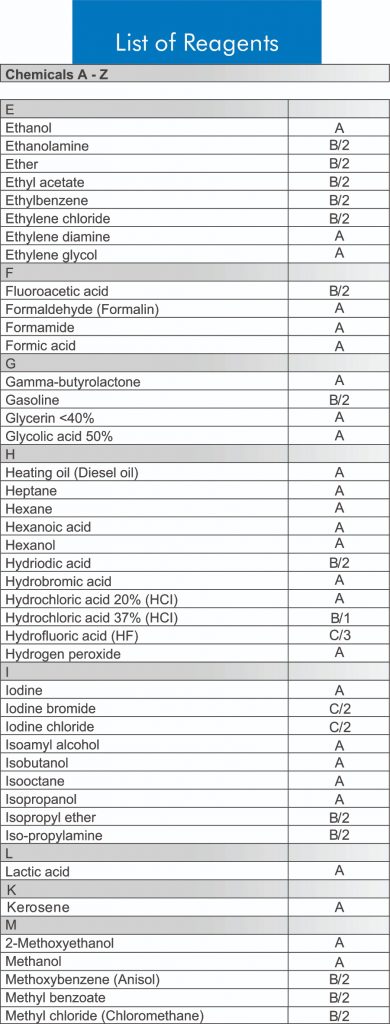
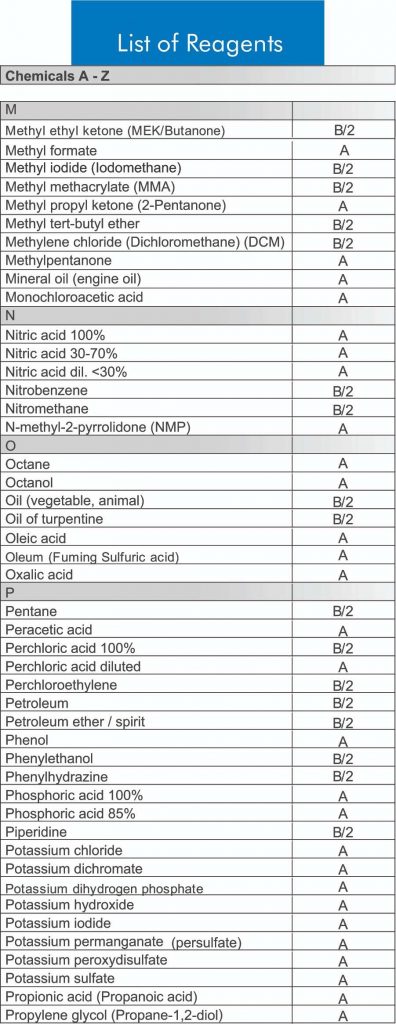
7. List of Recommended Reagents
Chemicals from A to Z
The following tables enlist the most frequently used reagents. They provide useful information for the safe and efficient use of MICROLIT E-BURETTE. All the safety precautions and recommendations within this Operation Manual must be followed carefully.
Code explanations
A = Good resistance
B = Acceptable with limitations
C = Not recommended
1 = Acid vapours (better resistance with lower concentration).
Do not leave the instrument on the bottle.
Rinse with distilled water after use.
2 = Risk of damage, softening or discoloration of external parts through vapours.
Do not leave the instrument on the bottle.
Rinse with distilled water after use.
3 = Chemical degradation of glass parts (plunger/barrel)
 |
 |
 |
 |
 |
|
 |
|
8. First Steps
First and foremost – check whether everything is there in the package.
Verify that the package includes:
1. Operation Manual
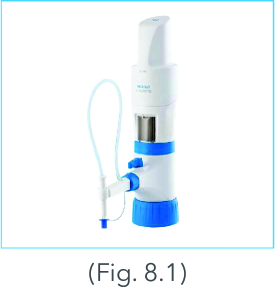
2. 10, 25 or 50 ml MICROLIT E-BURETTE
 |
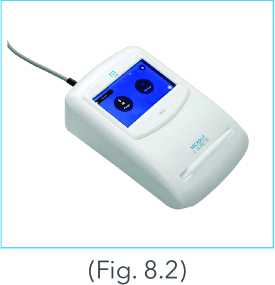
3. Control Panel
 |
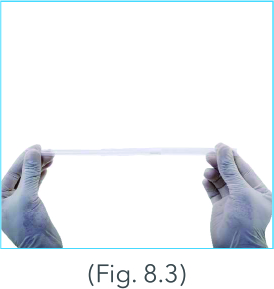
4. Telescopic Tube
 |
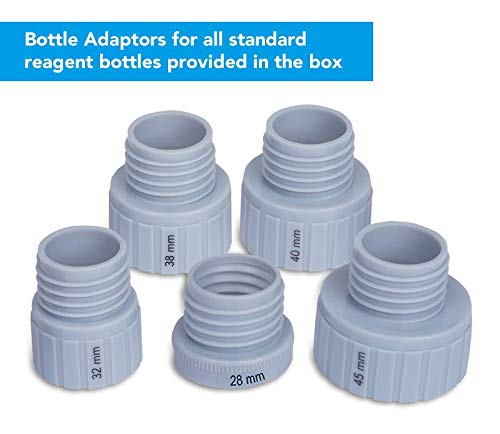
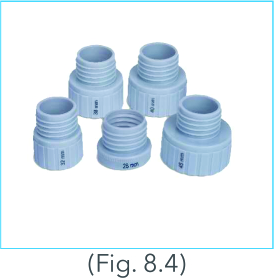
5. Bottle Adapters (28, 32, 38, 40, 45 mm)
 |
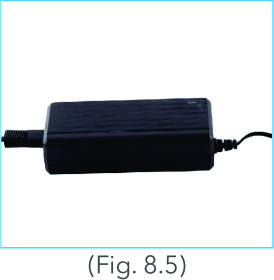
6. Charging AC Adaptor
 |
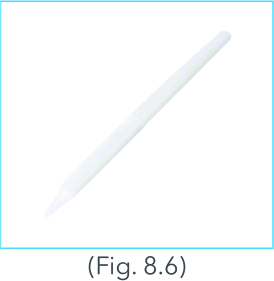
7. Control Panel Stylus
 |
8. USB Drive for software & driver
 |
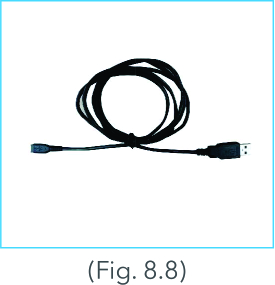
9. Mini USB Cable
 |
10. Extra Amber Coloured Windows
 |
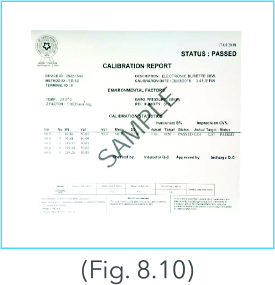
11. Calibration Certificate
 |
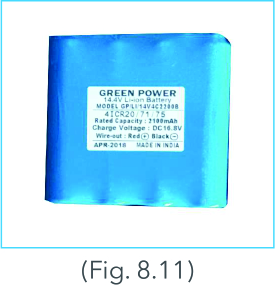
12. 14.4 V, 2000 mAh Li-ion Rechargeable Batteries
 |
9. Initializing
Wear protective clothing, protective gear for the eyes and hands. Follow all safety instructions and observe limitations of use and operating constraints. (Refer to section 4 and 5)
Connecting the batteries
1. Open the battery panel at the back of the control panel
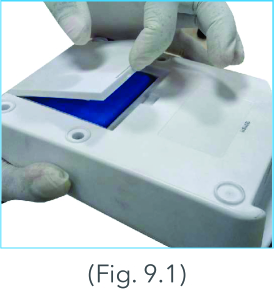 |
2. Connect the batteries to the panel wire by inserting the battery connector into the panel connector firmly. It locks with a ‘click’ sound.
 |
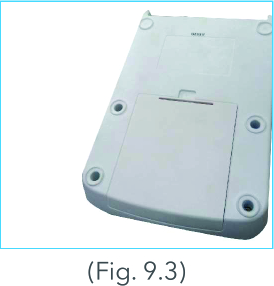
3. Close the panel
 |
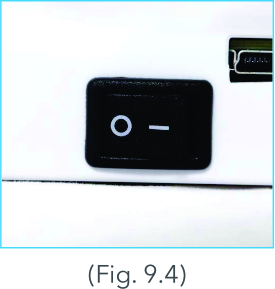
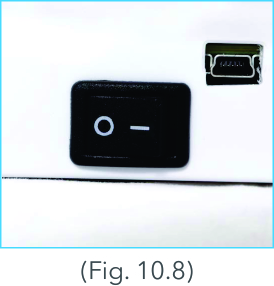
4. Press the ON/OFF button
 |
5. The screen will display ‘Welcome’.
 |
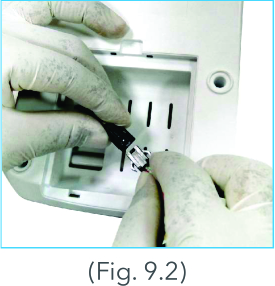
NOTE:
In order to replace the batteries, press the lock button to disengage the battery lock and remove the old batteries.
10. Setting Up
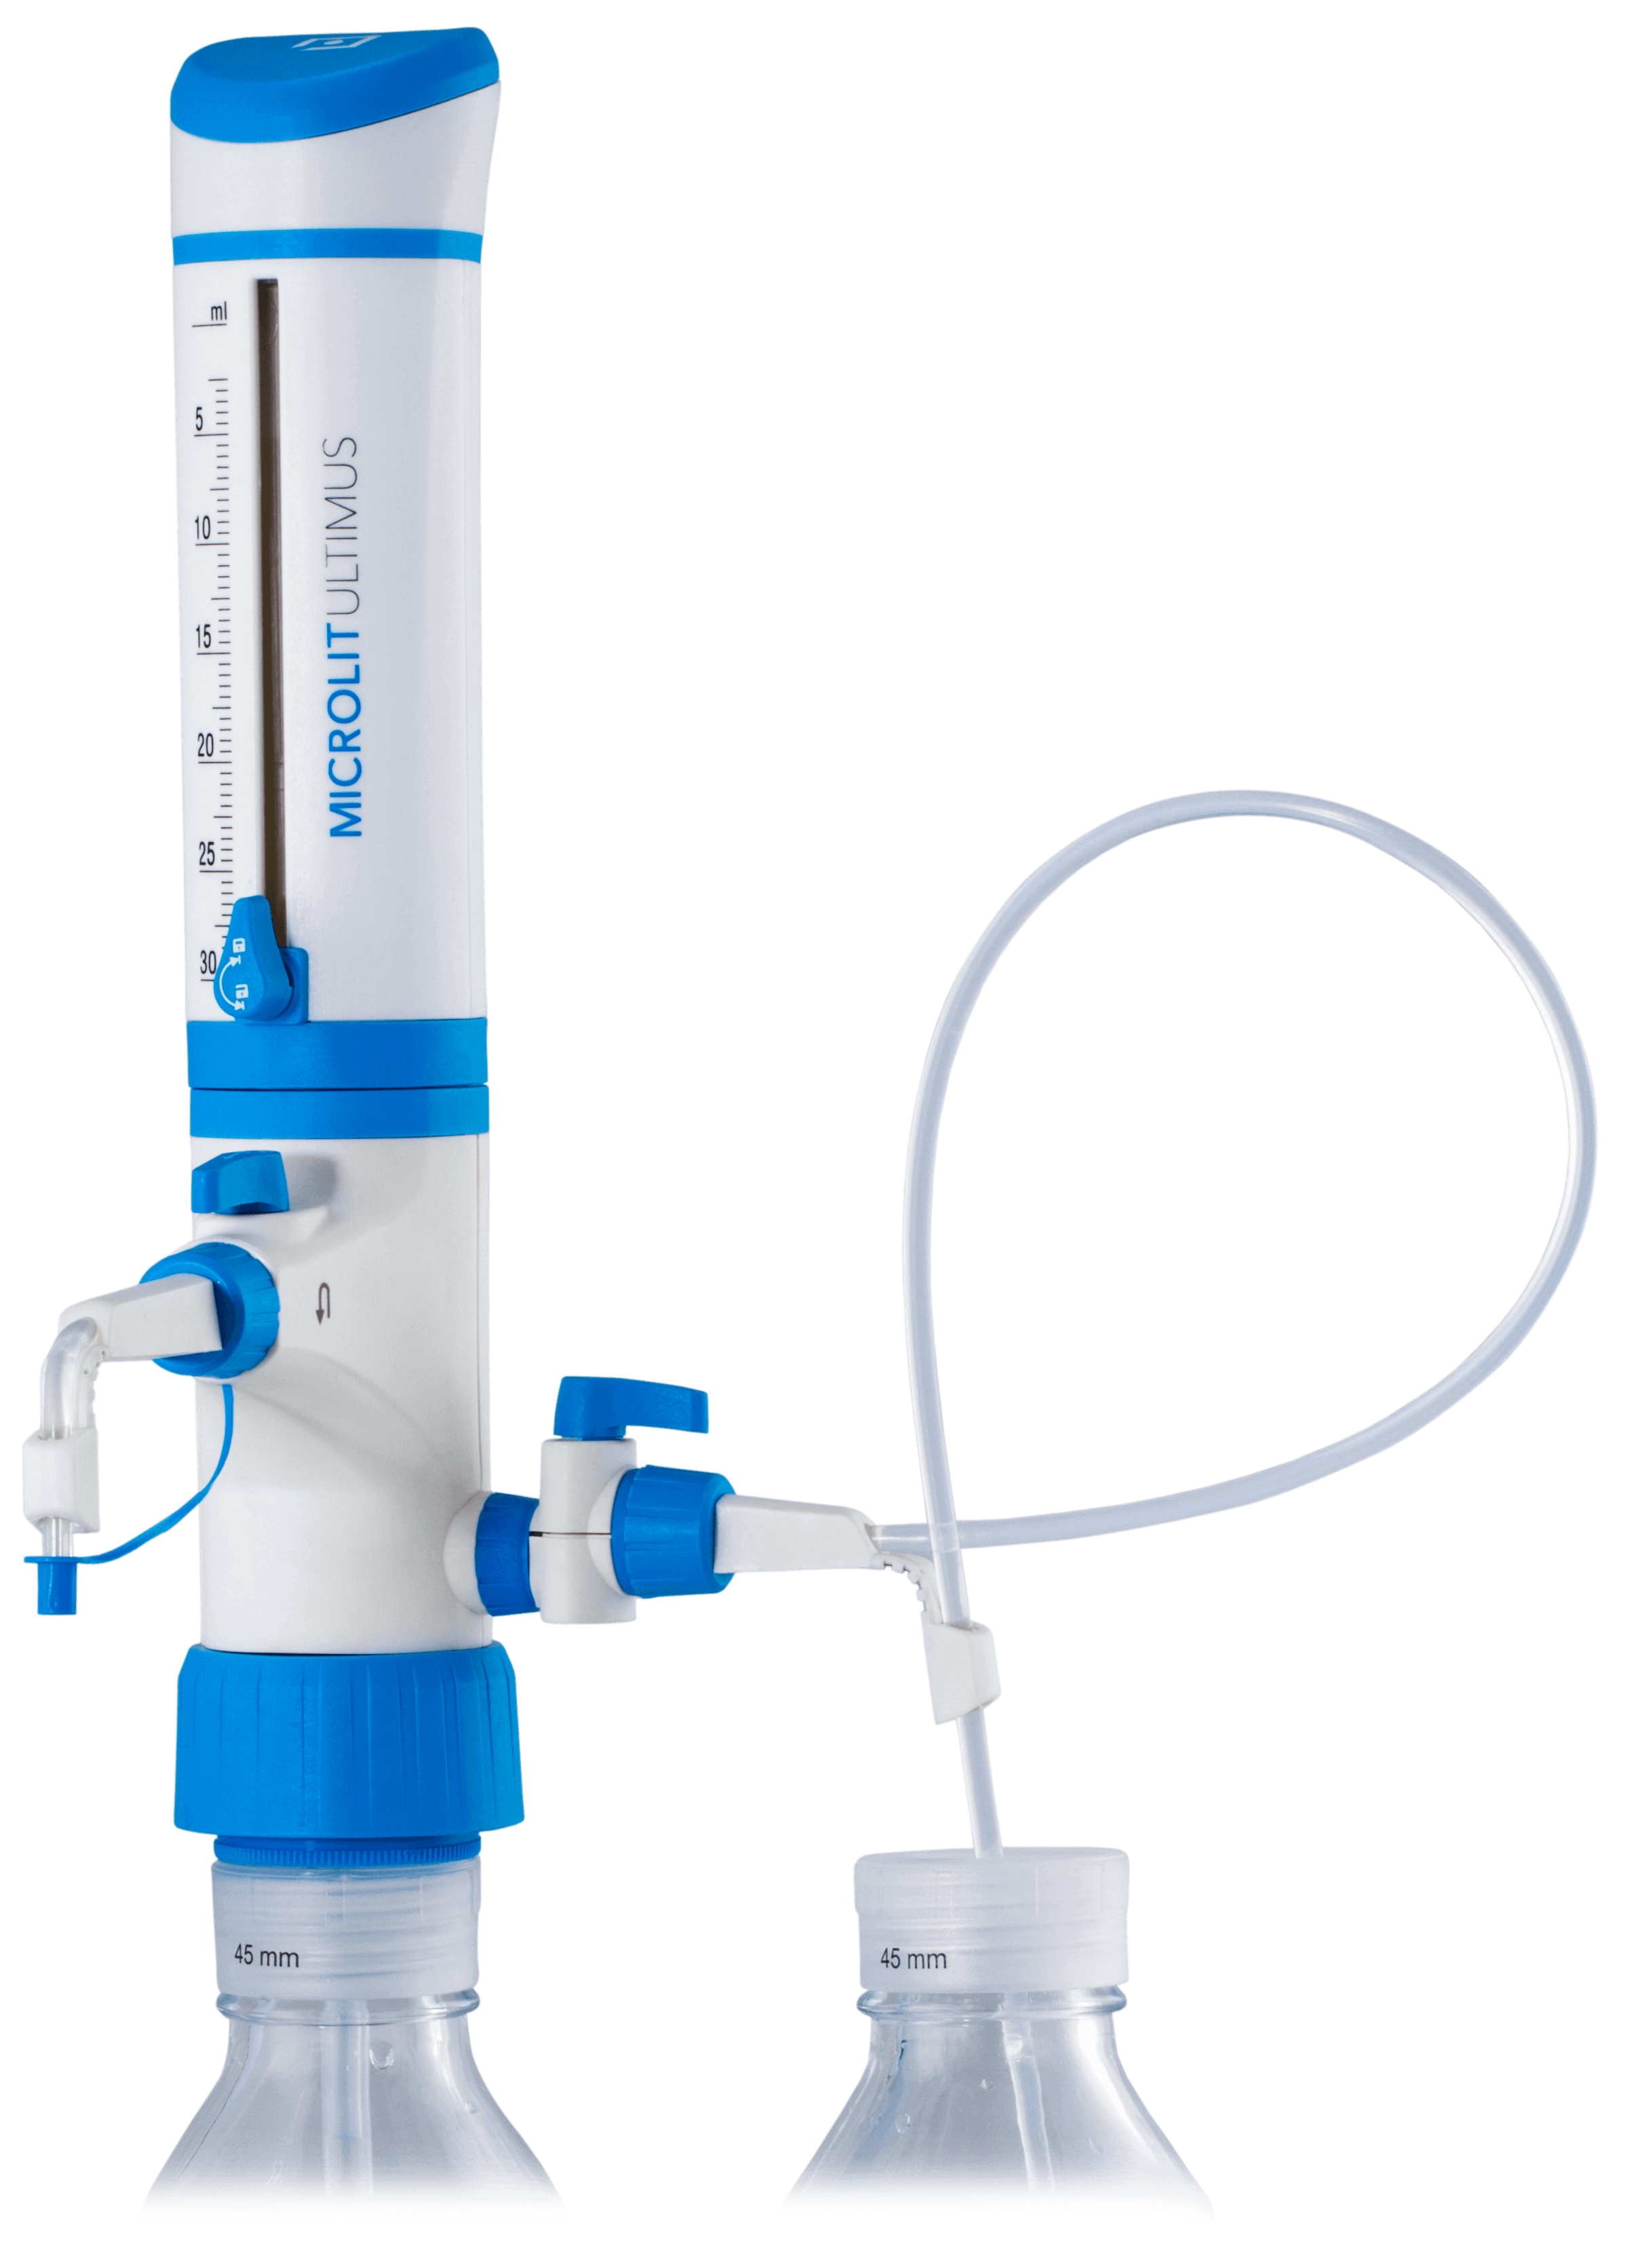
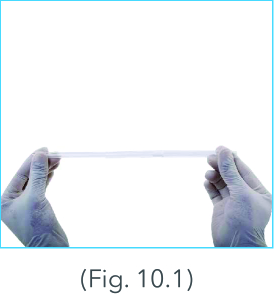
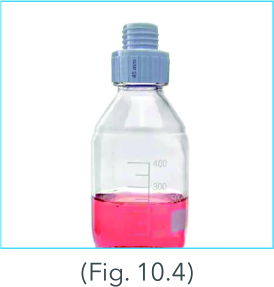
Adjust the length of the Telescopic tube (FEP tube) to fit your particular reservoir.
If you require a longer tube, it is provided on request.
1. Adjust the length of the Telescopic tube (FEP tube) to fit your particular reservoir. If you require a longer tube, it is provided on request.
 |
2. Fix the Telescopic tube as shown. The tube’s ends have different diameters – fix it from the wider end.
 |
3. Choose the correct adapter for the bottle. The threaded platform base of MICROLIT E-BURETTE has a 30 mm screw thread. Five adapters are supplied to suit containers with a 28, 32, 38, 40, 45 mm and
30 mm (inbuilt adapter) screw neck.
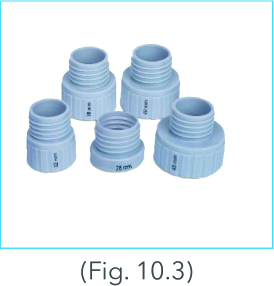 |
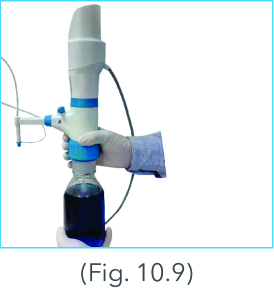
4. Fix the adapter on the reservoir bottle by screwing it in clockwise direction
 |
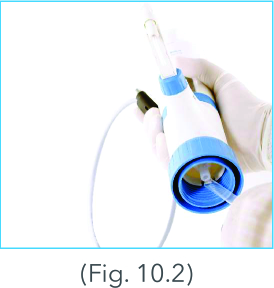
5. Mount the instrument. Screw it to the reservoir by applying gentle hand torque applied to the threaded platform base only. In case of removal, apply the same technique to the base, in the opposite direction.
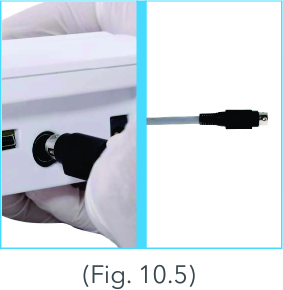
6. Connect the cable from the instrument housing to the port at the back of the control panel with a firm push, as shown. Check for the cable position. The flat surface of the connector with an arrow mark will face down.
 |
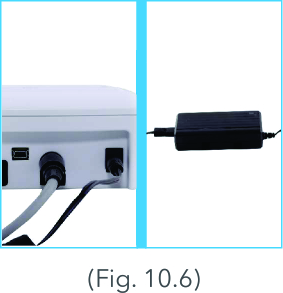
7. If charging is required, insert the charging pin at the back of the control panel and connect the power cord with the AC adaptor firmly and then plug the two pin power cord to the 220 V power supply
 |
8. The battery indicator will show the charging symbol.
 |
9. The E-Burette is now ready to be switched on. Press the ON button (of the ON/OFF button) at the back of the control panel to switch on the control panel.
 |
Transporting the instrument
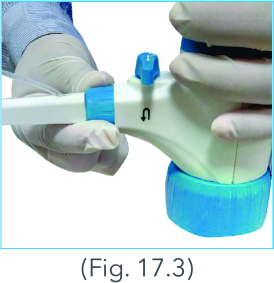
When mounted to a reagent bottle, always carry the instrument as shown and always store it in the upright position.
 |
11. Computer Connectivity
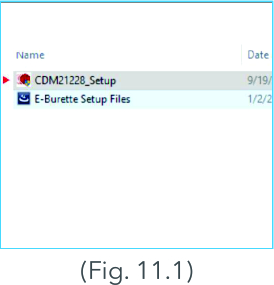
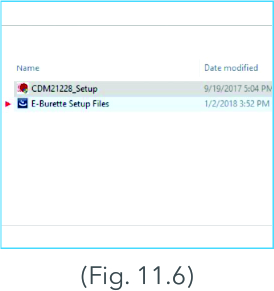
Insert the pen drive provided with the package in your PC/Laptop for driver files and software. Please note that there are two set up files in the pen drive.
- CDM21228
- E-Burette Setup Files
Procedure to install the driver & software:
1. Installing the CDM21228 driver files:
I. Double click the CDM21228 setup icon
 |
II. Press the Extract tab from the FTDI CDM driver window.
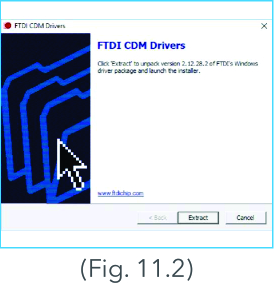 |
III. Click the Next button for installing the device driver
 |
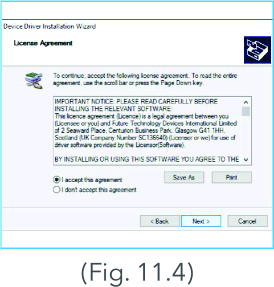
IV. Click to accept the licence agreement.
 |
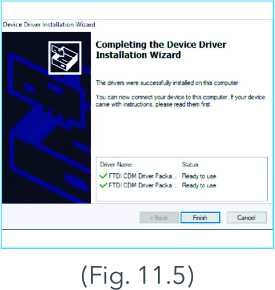
V. Then, click the Finish button on the device driver installation wizard.
 |
2. Installing the instrument software
I. Double click the E-BURETTE setup icon.
 |
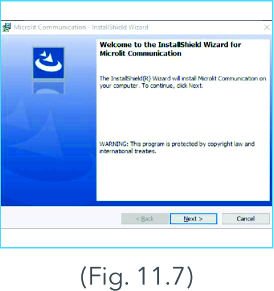
II. Click Next to start the Install Shield Wizard for MICROLIT Communication window.
 |
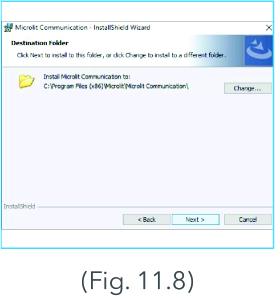
III. Click Next to choose the destination folder of the software files.
 |
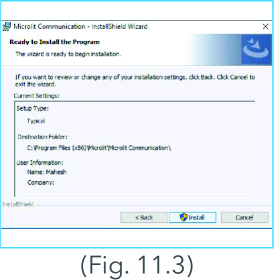
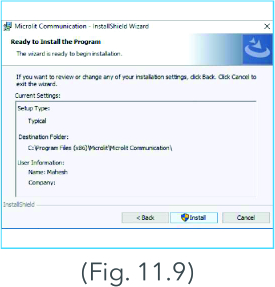
IV. Click Install for the ready to install program window.
 |
V. Click Next for the user account control window.
 |
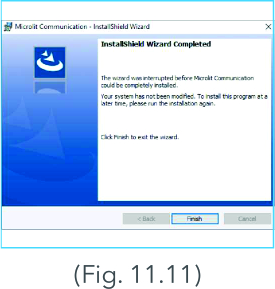
VI. Click Finish for the Install Shield Wizard completion window.
 |
VII. MICROLIT Communication icon will then appear on the desktop.
 |
12. Operating the instrument
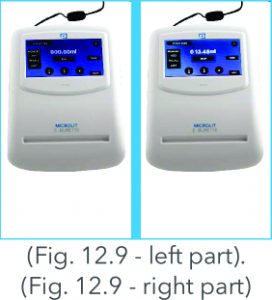
Switching on the Control Panel
1. Switch on the instrument using the ON/OFF switch at the back of the control panel.
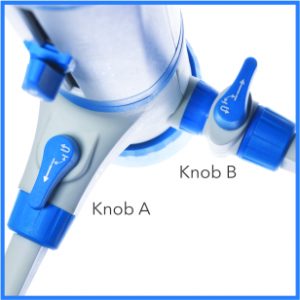
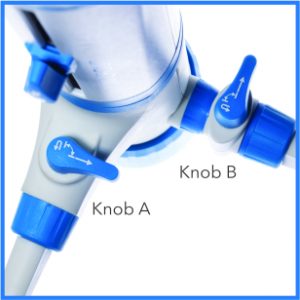
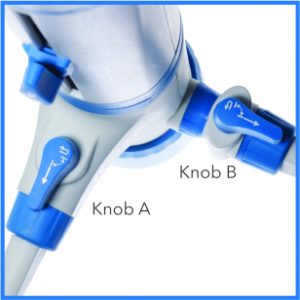
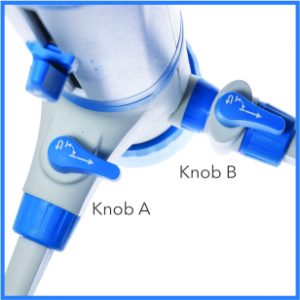
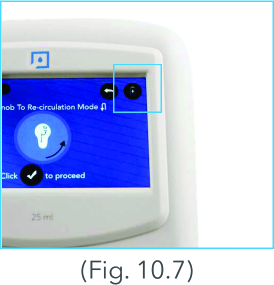
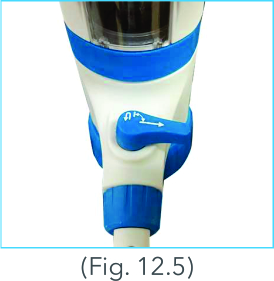
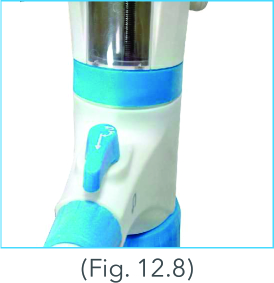
2. When it boots, the instrument will warn the user to switch the knob to recirculation mode.
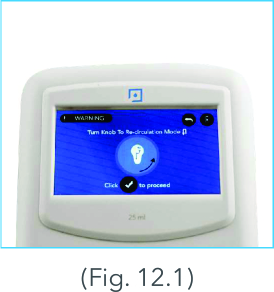 |
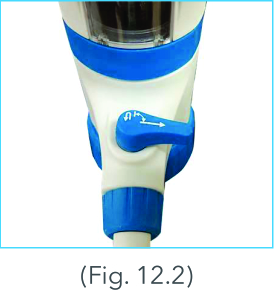
3. Turn the knob to re-circulation mode and click the tick mark on the control panel screen when ready.
 |
4. The instrument will reset automatically. It is now ready to use.
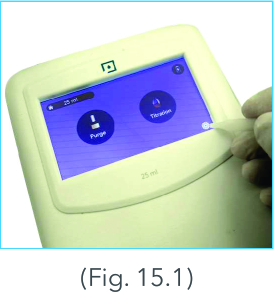
Purging
This step is recommended before using the Burette to ensure bubble free dispensing.
1. Click on the purging mode from the Home Screen on the control panel.
 |
2. The screen on the control panel will warn the user to turn the knob to re-circulation mode.
 |
3. Turn the knob to re-circulation mode and click the tick mark on the control panel screen when ready
 |
4. The E-BURETTE will purge automatically. If the device is still not properly purged, go to step 1 and repeat the procedure till no large air bubble is visible below the piston.
A few air bubbles up to 1 mm in size are permissible.
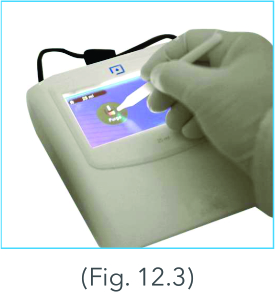
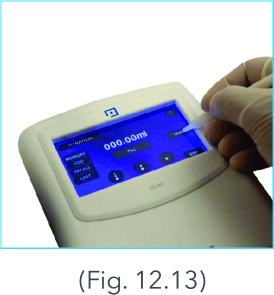
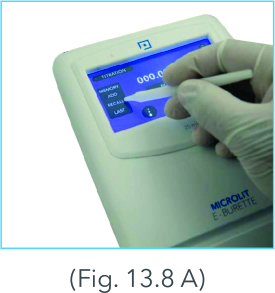
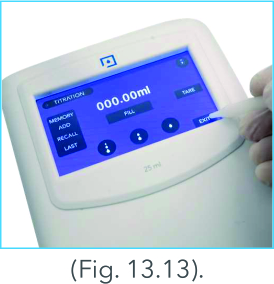
Titration
Wear protective clothing, protective gear for the eyes and hands. Liquid may accumulate in the cap. Follow all safety instructions and observe limitations of use and operating constraints. (Refer to section 4 and 5)
1. Remove cap from the discharge tube.
 |
2. Click on the Titration mode on the home screen.
 |
3. The screen on the control panel will warn the user to turn the knob to titration mode.
4. Turn the knob clockwise to set at titration mode and click the tick mark on the screen of the control
panel when ready
 |
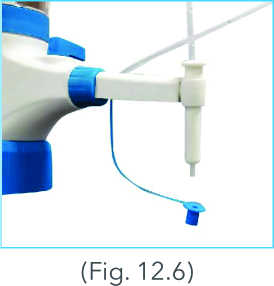
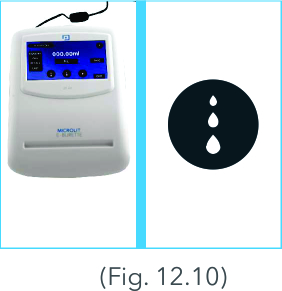
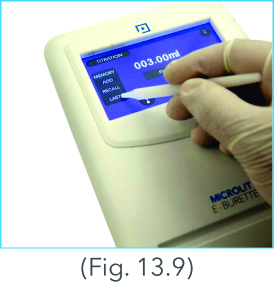
5. Place the discharge tube orifice against the inner wall of a suitable receiving vessel.
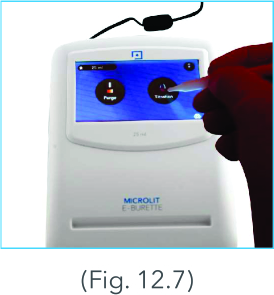
6. Now fill the barrel from the titration screen by clicking the FILL button. By pressing the STOP button, the filling volume can be stopped as and when you need to.
 |
7. Three dispensing speeds are provided, including drop-wise dispensing, which allows the user to achieve the end point very accurately.
I. Fast mode : In this mode, the dispensing speed is 2.2 ml/sec
 |
II. Medium mode : In this mode, the dispensing speed is 0.75 ml/sec
 |
III. Dropwise mode : In this mode, the dispensing speed is 0.025 ml/sec
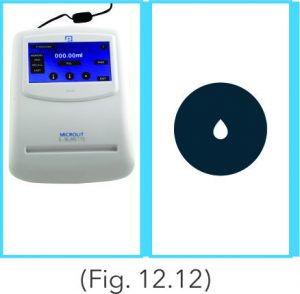 |
8. Dispensing can be performed by touching the screen and stops immediately when the touch is removed.
9. Press the TARE button to reset to Zero & repeat.
 |
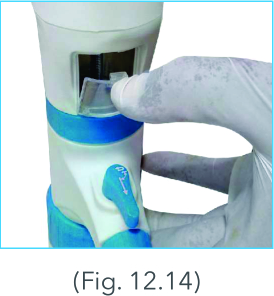
Sensitive Media
For light-sensitive media (e.g., Iodine, Potassium Permanganate and Silver Nitrate solutions), we recommend the use of ‘Amber Coloured Windows’ or the inspection windows provided in the box.
1. To replace the inspection window, unclip the default inspection window by pressing it from its top and
then removing it.
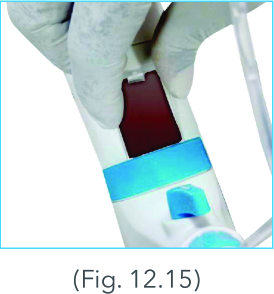
 |
2. Place the Amber Coloured Window in the slot provided at the bottom of the housing and press it down until you hear a click sound.
 |
13. Data Transfer Setup
Connecting the USB Mini Cable:
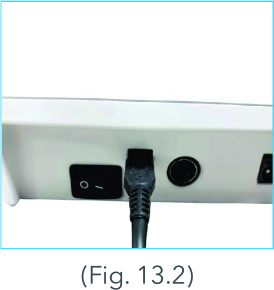
1. Connect the Mini USB cable from the control panel to your PC/Laptop for transferring and storing the control panel’s data on the latter.
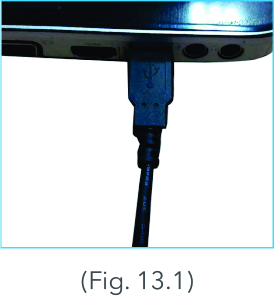 |
2. Insert the wider end of the USB cable in the USB port of the PC/Laptop and the smaller end at the back of the control panel.
 |
Software Initialization
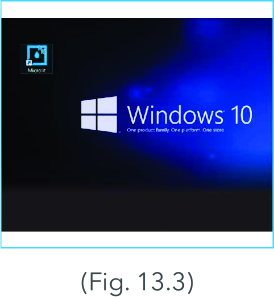
3. Double click on the Microlit Communication icon to run the software.
 |
4. From the Ports List button, select the port from the drop down menu.
 |
5. Click on OPEN PORT.
 |
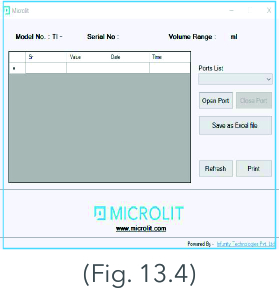
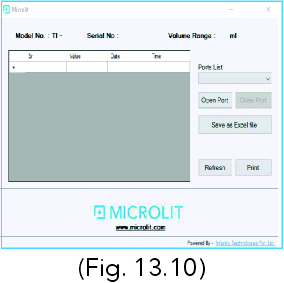
6. The window will capture the model number, serial number and the volume range of the E-BURETTE.
 |
7. Click ADD from the control panel to save the readings from the control panel to the PC/Laptop
 |
Note: The ADD button shall blink and the data shall be transferred to the PC/Laptop.
8. The readings will also be saved in the internal memory. Please note that all fields are captured in the file.
Memory
1. Click ADD from the control panel to save the readings from the control panel to the internal memory.
2. To recall the previous recorded reading (s), press the RECALL button.
 |
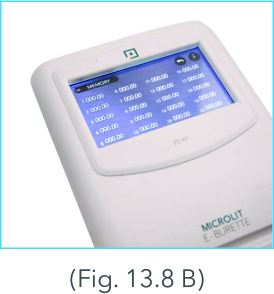
Please note that the recall grid displays the last 20 recorded readings. The LAST saved reading will be displayed on the number 1 position of the table.
 |
3. For quick recall of the last reading, press the LAST button. Please note that the last saved readings will be displayed till the time LAST button is pressed.
 |
Creating a File Name
1. Select the port from the port list dropdown menu.
2. Click Open port.
3. The Software captures the Model No., Sr. no. and volume range.
4. After transferring the data from control panel to the software window we can save the file by clicking the
“Save as Excel File”.
 |
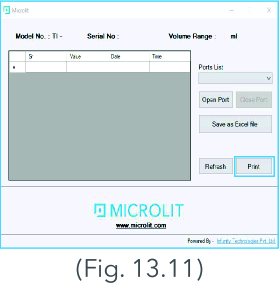
Printing the data
The data recorded while operating the E-BURETTE can be printed directly from the software by clicking
the PRINT tab. For this, select the printer and print the readings. You can also access the saved .xls file to print.
 |
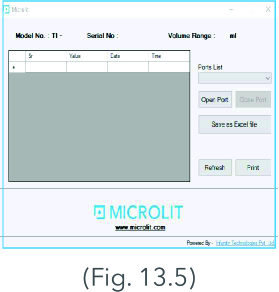
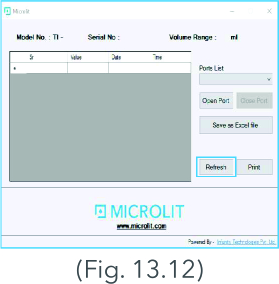
Refresh
To start afresh for new readings on the software, click on the REFRESH tab. The readings on the grid shall be deleted and new readings can now be transferred in it.
 |
Exit
1. To end working with the E-BURETTE, press the Exit button. The panel will warn the user to turn the
knob in the re-circulation mode.
2. Click on the tick ( ) button to proceed. The piston will empty the barrel and go to the home position.
3. Press the ON/OFF button to switch OFF the control panel.
 |
14. Error Limits
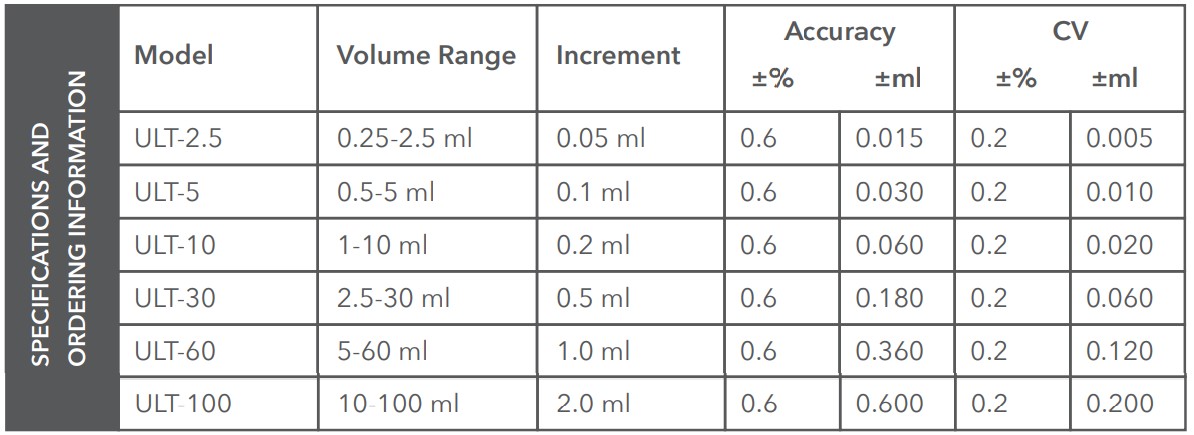
The error limits (Accuracy and Coefficient of Variation) mentioned in Product Specifications (Page 1) are in accordance with the nominal capacity (or maximum volume) indicated on the instrument. These are obtained by using the instrument with distilled water at equilibrium, ambient temperature of 20 °C, while operating the device smoothly and steadily. The error limits are well within the limits of DIN EN ISO 8655-3.
| Capacity (ml) |
Increment (ml) |
Accuracy (± %) |
Accuracy (±ml) |
CV (± %) |
CV (±ml) |
| 10 | 0.005 | 0.1 | 0.01 | 0.1 | 0.01 |
| 25 | 0.01 | 0.07 | 0.0175 | 0.05 | 0.0125 |
| 50 | 0.01 | 0.05 | 0.025 | 0.05 | 0.025 |
15. Calibration
User Calibration Procedure
The E-BURETTE has been laboratory calibrated at its nominal volume. However, due to changes in environmental conditions and the viscosity of the media which is dispensed, we recommend gravimetric testing
every 3-12 months. Gravimetric volume testing according to DIN EN ISO 8655-6 is performed as follows:
1. Click the settings icon on the bottom right of the Home Screen.
 |
2. From the settings menu, choose Calibration.
 |
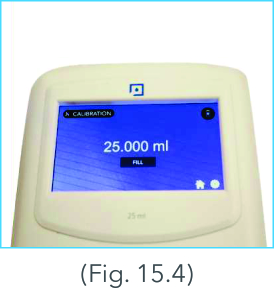
3. Fill the nominal volume of double distilled de-ionized water by clicking the FILL button on the calibration screen of the operating panel.
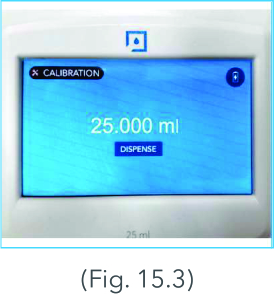 |
4. Dispense the filled liquid by clicking on the DISPENSE button on the calibration screen of the control panel.
 |
5. Measure the dispensed liquid on a balance and enter the value in mg using the provided electronic keyboard. Click the tick mark to proceed.
Note: CAL label will start appearing on top of all screens.
6. Repeat this procedure until the nominal volume is achieved on the electronic balance.
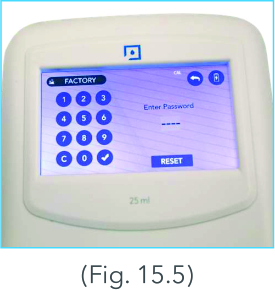
Factory Reset
The factory reset is for the MICROLIT factory settings which is password protected and intended to be used at the manufacturing facility. (Fig. 15.5) If the reset button is pressed, the user calibrated settings
shall be reset with the default factory settings & the CAL label will disappear from the screens.
 |
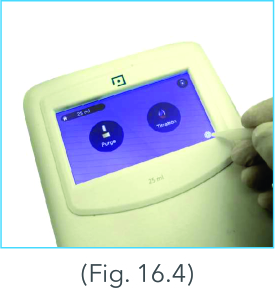
16. Other Settings
Control panel brightness setting
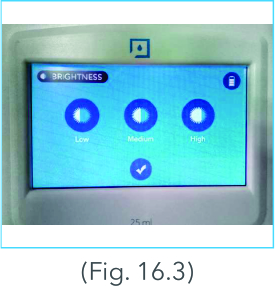
User can change brightness from setting screen on the control panel.
1. Click on the settings icon from the home screen.
 |
2. In the settings windows, click the BRIGHTNESS icon.
 |
3. From the BRIGHTNESS window, select the level of brightness and tick mark to save it.
 |
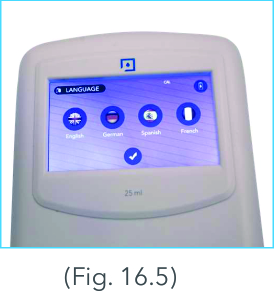
Language Settings
User can select the preferred language from the language settings.
4. Click on the settings icon from the home screen.
 |
5. Select the preferred language from the tab by clicking on it and tick mark ( ) to save it.
MICROLIT E-BURETTE supports four languages – English, German, Spanish and French.
 |
17. Cleaning and Product Maintenance
Whenever cleaning is required, run the burette under distilled water. Fill the barrel completely with distilled water and press the fast dispense button to dispense the water completely.
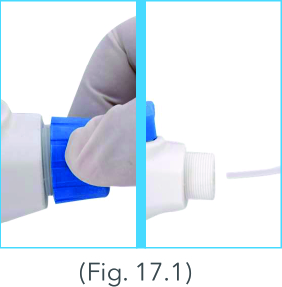
Procedure to Disassemble the Delivery Pipe:
Unscrew the chuck nut by rotating it in anticlockwise direction and pull out the delivery pipe. Clean the delivery pipe with de-ionized water.
 |
Procedure to Assemble the Delivery Pipe:
1. First push the delivery pipe into the lower housing till it stops going in further.
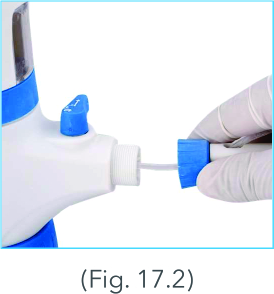 |
2. Screw the chuck nut to complete the assembly by turning it in clockwise direction.
Note: Use rubbing alcohol on a cloth or cotton to clean the external body
 |
18. Troubleshooting
| Problem | Possible Causes | Solution |
| Piston difficult to move | Formation of crystals or deposition of dirt |
Perform a cleaning cycle |
| Filling not possible | Filling valve stuck | – Clean the filling valve. – If the valve ball is stuck, use a 200 µl plastic tip to loosen it |
| Air bubbles in the instrument | – Purging not complete – Filling tube loose or damaged – Filling tube does not dip into the liquid |
– Purge the instrument again. – Fasten the telescopic filling tube firmly. If necessary, cut the tube off by approx. 1 cm from the top or replace it. – Fill up the bottle, or correctly adjust the length of the telescopic filling tube. |
| The volume delivered is smaller than that indicated | The instrument has not been completely primed | Prime the instrument again. |
| The instrument doesn’t indicate any function | Internal error | Perform a restart |
19. Return for repair
1. Clean and decontaminate the instrument carefully.
2. Always mention the exact description of the type of malfunction and the media used. Please note that if information regarding media used is missing, the instrument cannot be repaired.
3. Shipment is at the risk and the cost of the sender.
20. Calibration Guidelines
ISO 9001 and GLP-guidelines require regular examinations of your volumetric instruments. We recommend checking the volume every 3-12 months. The interval depends on the specific requirements of the
instrument. For instruments frequently used or in use with aggressive media, the interval should be shorter.
21. Warranty
MICROLIT shall not be liable for the consequences of improper handling, use, servicing, operation or unauthorized repairs of the instrument or the consequences of normal wear and tear, especially of wearing parts such as pistons, seals, valves and the breakage of glass as well as the failure to follow the instructions of the operating manual. We are not liable for damage resulting from any actions not described in the operating manual or non-original spare parts or components being used.
22. Disposal
- The adjoining symbol means that storage batteries and electronic devices must be disposed of separately from household trash (mixed municipal waste) at the end of their service life.
- According to the Directive 2002/96/EC of the European Parliament and of the Council on Waste Electrical and Electronic Equipment (WEEE) published on 27 January 2003, electronic equipment requires disposal according to the relevant national disposal regulations.
- Batteries contain substances that can have harmful effects on the environment and human health. Therefore, according to the Directive 2006/66/EC of the European Parliament and the Council on Waste Batteries of 6 September, 2006, batteries require disposal according to the relevant national disposal regulations. Dispose the batteries only when they are completely discharged. Do not short-circuit the battery to discharge it. Subject to technical modifications without notice. Errors accepted.
To know more about Microlit Burette, please visit the product page https://www.microlit.us/product-category/burette/.