• Multiple Offers
    Multiple Offers
  • Support
    Real-Time Support
  • Free Replacement
    1-Year Free Replacement Warranty
  • (732) 321-0852

Best Practices for Handling Hazardous Chemicals with Bottle Top Dispensers

Handling hazardous chemicals safely is of paramount importance in laboratories, industrial settings, and research facilities. Bottle top dispensers are indispensable tools that help dispense accurate volumes of liquids, but they must be used with caution when dealing with hazardous substances. This blog post will outline the best practices for safely handling hazardous chemicals with bottle top dispensers, ensuring the well-being of both laboratory personnel and the environment.

  • Select the Appropriate Dispenser

Choosing the right bottle top dispenser is the first step in ensuring safe chemical handling. Make sure the dispenser is compatible with the chemical you are working with. Factors to consider include chemical compatibility, material construction, and the dispenser’s capacity. Always consult the chemical’s Safety Data Sheet (SDS) for compatibility information.

  • Conduct a Risk Assessment

Before dispensing any hazardous chemical, conduct a thorough risk assessment. Evaluate the potential hazards associated with the chemical, including its toxicity, flammability, reactivity, and volatility. Assess the potential risks associated with the specific task you’re performing, such as the volume you’re dispensing and the environment in which you’re working.

  • Personal Protective Equipment (PPE)

Wearing the appropriate PPE is crucial when handling hazardous chemicals. Always don the necessary protective gear, such as lab coats, gloves, safety goggles, and chemical-resistant aprons. Ensure that your skin, eyes, and respiratory system are adequately protected.

  • Secure the Workspace

Set up your workspace in a well-ventilated area designed for chemical handling. Keep flammable materials away, and ensure that emergency equipment, such as eyewash stations and fire extinguishers, is readily accessible. Minimize distractions in the workspace to maintain focus during the dispensing process.

  • Dispensing Procedures

Follow these best practices when dispensing hazardous chemicals with a bottle top dispenser:

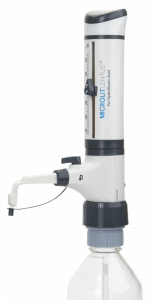
    1. Choose the Right Adaptor: The dispenser comes with a set of bottle adapters to help you mount it on various reagent bottles of standard sizes. To avoid reactivity with most chemicals, adaptors are typically made of polypropylene (PP). For aggressive acids and solvents, ETFE/PTFE adaptors can be used. The correct adaptor should be chosen based on the neck size of the reagent bottle. The adapter is available in five different sizes: 28mm, 32mm, 38mm, 40mm, and 45mm.
    2. Attach the inlet telescopic tube: The telescoping tube can be adjusted to fit the size of the bottle (height) and then fixed at the bottom of the bottle top dispenser.
    3. Mount the dispenser on the reagent bottle: After connecting the inlet tube to the dispenser, place it on the reagent bottle and tightly screw the dispenser onto the bottle.
    4. Purge the dispenser: It is crucial to remove air bubbles from the dispenser barrel as it may cause inaccuracy in the liquid dispensing. 
      1. Turn on the recirculation knob by rotating it 90 degrees anti-clockwise.
      2. Aspirate and dispense a few times until this barrel is bubble-free.
      3. Turn off the recirculation knob by rotating it clockwise towards the dispensing nozzle.
      4. Aspirate and dispense to ensure bubble-free dispensing.
    5. Slow and controlled dispensing: To avoid splashes, dispensing must be done slowly. 
      1. Remove the cap from the discharge tube. Set the volume of liquid to be dispensed using the volume adjustment knob. 
      2. Turn the valve to ‘Dispensing’. 
      3. Gently lift the piston until the upper end. 
      4. Press the piston downwards slowly and steadily with minimal force until it reaches the bottom and all the liquid in the barrel is dispensed. 
      5. Wipe off the discharge tube against the inner wall of the receiving vessel
    6. Label containers: Clearly label all containers, including the source container and the receiving vessel, with the chemical’s name, hazard symbols, and concentration.
    7. Recordkeeping: Maintain a detailed record of the chemicals dispensed, including dates, quantities, and purpose.
  • Regular Maintenance

Proper maintenance of bottle top dispensers is vital for their longevity and accuracy. Regularly calibrate the dispensers to ensure they deliver accurate volumes. Cleaning the dispensers thoroughly after use prevents cross-contamination.

  • Waste Disposal

Dispose of hazardous chemical waste in accordance with local, state, and federal regulations. Segregate waste streams, and label waste containers appropriately.

  • Training and Education

Ensure that all personnel using bottle top dispensers with hazardous chemicals receive proper training. Training should include the safe use of the dispenser, chemical handling protocols, and emergency response procedures.

Handling hazardous chemicals with bottle top dispensers can be done safely by following best practices and maintaining a strong commitment to safety. The well-being of laboratory personnel and the environment depends on meticulous planning, proper equipment selection, and strict adherence to safety procedures. By implementing these best practices, you can minimize the risks associated with working with hazardous chemicals and promote a safer working environment.

Microlit Lentus for Hydrofluoric acid

Microlit LentusMicrolit Lentus® is a bottle top dispenser meticulously crafted using rigorously chosen and tested materials, ensuring the secure and precise dispensing of highly reactive chemicals, such as Hydrofluoric acid, directly from the source bottle.

As a result of the unique materials used in its construction, our research and development teams have demonstrated that when users follow the precise Microlit Lentus® cleaning procedures before dispensing high-purity media, the Microlit Lentus® dispenser ensures safe and effective performance.

To know more about the features and functionalities of Microlit LENTUS, we request you to reach out to us at info-usa@microlit.com or visit our website, Microlit Lentus.

Pipettes in Clinical Diagnostics: Ensuring Accuracy in Patient Testing

In the world of clinical diagnostics, accuracy is paramount. Every test result has the potential to impact a patient’s life, making it crucial that healthcare professionals have the tools they need to ensure precise measurements. One such tool that plays a vital role in clinical diagnostics is the pipette. In this blog, we will delve into the significance of pipettes in clinical diagnostics and how they contribute to the accuracy of patient testing.

The Role of Pipettes in Clinical Diagnostics

Pipettes are laboratory instruments designed to measure and transfer precise volumes of liquids. They come in various types, including micropipettes, adjustable pipettes, and serological pipettes, each suited to different tasks within the clinical diagnostic process. Here’s how pipettes are involved in ensuring the accuracy of patient testing:

  • Sample Preparation

Pipettes are used to accurately measure and transfer patient samples, reagents, and calibration standards. Whether it’s blood, urine, or other bodily fluids, the precise handling of samples is crucial to obtain accurate test results.

  • Reagent Dispensing

In many diagnostic tests, reagents must be added in precise volumes to react with patient samples. Pipettes are used to dispense these reagents accurately, ensuring that the chemical reactions are consistent across all tests.

  • Dilution Series

Clinical diagnostics often require the preparation of dilution series to assess the concentration of specific analytes in patient samples. Pipettes play a crucial role in creating these series, which are essential for accurate quantification.

  • Quality Control

Pipettes are subject to rigorous quality control measures to guarantee their accuracy. Regular calibration and maintenance are necessary to ensure that pipettes deliver the correct volumes consistently.

  • Minimizing Cross-Contamination

Pipettes are designed with features to prevent cross-contamination between samples. This is especially critical in clinical diagnostics to avoid erroneous results and patient misdiagnosis.

Best Practices for Using Pipettes in Clinical Diagnostics

To ensure accuracy in patient testing, healthcare professionals must follow best practices when using pipettes:

1.  Calibration

Regularly calibrate pipettes according to manufacturer recommendations. Calibration ensures that pipettes maintain their accuracy over time.

2.  Proper Technique

Train staff in proper pipetting techniques to minimize human error. This includes using the correct pipetting angle, maintaining a consistent speed, and using the appropriate tips.

3.  Pipette Selection

Choose the right type and volume of pipette for the specific task. Using the wrong pipette can lead to inaccurate results.

4.  Maintenance

Keep pipettes clean and well-maintained. Regularly clean them to prevent sample carryover and contamination.

5.  Verification

Verify pipette accuracy by testing them with known standards periodically. Any discrepancies should trigger recalibration or maintenance.

Pipettes are unsung heroes in the field of clinical diagnostics, ensuring the accuracy of patient testing through precise measurements and controlled handling of samples and reagents. Healthcare professionals must recognize the critical role pipettes play and follow best practices to maintain their accuracy. By doing so, we can continue to rely on clinical diagnostics for accurate and timely patient results, ultimately improving healthcare outcomes.

Introducing Microlit NERO: Elevating Precision and Convenience in Laboratory Work

Microlit is excited to present Microlit NERO, an innovative line of micropipettes incorporating advanced technologies such as UniCal™ and Air™, meticulously crafted to offer unparalleled accuracy and user-friendly operation for our esteemed laboratory professionals.

The Microlit NERO series encompasses Single Channel Fixed Volume, Variable Volume, and Multichannel pipettes, serving as indispensable tools in pathology, microbiology, and diagnostic testing laboratories, where the precise handling of minute volumes is indispensable. Moreover, these adaptable pipettes extend their utility to a diverse range of industries, including pharmaceuticals, food and beverage, research institutions, fast-moving consumer goods (FMCG), cement, chemicals, natural resources, and agriculture.

For a comprehensive exploration of the remarkable features and functionalities of Microlit NERO, we request you to reach out to us at info-usa@microlit.com or visit our website, Microlit NERO.

Liquid Handling in Genomics: From DNA Extraction to Sequencing

Genomics is a fascinating field that has revolutionized our understanding of life and has far-reaching implications in areas ranging from medicine to evolutionary biology. At the heart of genomics lies the intricate process of DNA extraction to sequencing, a journey filled with precision, innovation, and complexity. In this blog, we’ll delve into the key steps and technologies involved in this transformative process.

The DNA Extraction Process: Unearthing the Genetic Code

At the outset of any genomic analysis, the crucial first step is DNA extraction. This process involves isolating DNA from a sample, whether it’s a tiny piece of tissue, a blood sample, or even environmental DNA from soil or water.

DNA Extraction

Here’s a glimpse into the DNA extraction process:

Step 1: Sample Collection – Gathering the Genetic Clues

The DNA extraction process begins with the collection of biological material that contains DNA. This can be anything from a blood sample, a cheek swab, a piece of hair, or even a fragment of ancient bone. The key is to obtain a sample that contains the genetic material of interest.

Step 2: Cell Lysis – Breaking the Cellular Barriers

Once we have our sample, we must access the DNA hidden within cells. To do this, we perform cell lysis, a process that involves breaking open the cells to release their contents. This is typically achieved by using a lysis buffer that contains detergents and enzymes to disrupt the cell membranes, allowing the DNA to be exposed.

Step 3: DNA Purification – Separating the Precious Cargo

The DNA released during cell lysis is often mixed with proteins, lipids, and other cellular debris. To isolate the DNA, we employ purification methods. This involves precipitating the DNA with alcohol, which causes it to clump together, making it separable from the rest of the cellular material. The purified DNA is now ready for further analysis.

Step 4: Quantification and Quality Control – Ensuring We Have What We Need

Before proceeding with any downstream experiments, it’s crucial to determine the quantity and quality of the extracted DNA. This is done using techniques such as UV spectrophotometry and gel electrophoresis. Ensuring the DNA is of sufficient quantity and quality is essential for the success of subsequent experiments.

Next-Generation Sequencing (NGS): Decoding the Genetic Blueprint

Once the DNA is successfully extracted, the next phase in the genomic journey is sequencing. Modern genomics relies heavily on a technology called Next-Generation Sequencing (NGS), which has revolutionized the field with its speed and precision:

Next Generation Sequencing NGS

  • Library Preparation: In NGS, the DNA is fragmented into smaller pieces and prepared into a sequencing library. Adapters are added to the DNA fragments, allowing them to attach to a solid surface or flow cell.
  • Sequencing: The heart of NGS involves reading the DNA sequence. This is achieved by various methods, with Illumina sequencing being one of the most common. During sequencing, the DNA bases are identified as they pass a sensor, generating vast amounts of data.
  • Data Analysis: The raw sequencing data is processed using sophisticated bioinformatics tools. This step involves aligning the short DNA sequences to a reference genome or assembling them into longer contiguous sequences, known as contigs.
  • Interpretation: Once the data is analyzed, researchers can interpret the genetic information. This can include identifying mutations, structural variations, or specific genetic markers related to a particular research question.

Challenges and Future Directions

While DNA extraction to sequencing has come a long way, it’s not without its challenges. These challenges include handling minute sample sizes, minimizing contamination, and managing the immense data generated during sequencing.

The future of genomics holds exciting prospects, with emerging technologies promising even more efficient and cost-effective sequencing methods, such as nanopore sequencing and single-cell sequencing. These advancements are expected to open up new frontiers in personalized medicine, evolutionary biology, and beyond.

From the meticulous DNA extraction process to the cutting-edge Next-Generation Sequencing technology, the journey from DNA to sequencing is a marvel of modern science. It has already reshaped our understanding of biology and holds boundless potential for discoveries yet to come. As technology continues to advance, genomics will continue to unveil the secrets hidden within the genetic code of life.

Microlit NERO Micropipettes

Microlit is thrilled to introduce Microlit NERO, a cutting-edge series of micropipettes featuring advanced technologies like UniCal™ and Air™, designed to provide exceptional precision and convenience to our valued laboratory users.

The Microlit NERO series includes Single Channel Fixed Volume, Variable Volume, and Multichannel pipettes, which find essential applications in pathology, microbiology, and diagnostic testing laboratories where accurate handling of small volumes is paramount. Additionally, these versatile pipettes have broad-reaching utility across various industries, including pharmaceuticals, food and beverage, research institutes, fast-moving consumer goods (FMCG), cement, chemicals, natural resources, and agriculture.

To know more about the features and functionality of Microlit NERO, please contact us at info-usa@microlit.com or visit our website Microlit NERO.

How to aspirate the correct volume using a pipette filler?

Serological or volumetric pipettes are the traditional and convenient mode of liquid transfer in milliliters from reservoirs with either small diameters or long necks, by minimizing the chances of cross-contamination.

2674044 0

These can be disposable or autoclavable. To draw liquid into a serological pipette, traditionally mouth pipetting was preferred, where the liquid was being drawn using the suction created by mouth. This technique has been banned worldwide due to the serious health risks associated with this. To overcome this, pipette controllers were introduced.

A pipette filler also referred to as a pipette controller or pipette aid, is a handheld device commonly utilized in laboratories for aspirating and dispensing liquids using a serological pipette. Its purpose is to simplify the pipetting process by offering a comfortable grip, precise control, and easy operation.

A pipette filler typically consists of the following components:

Handheld Unit: The main part of the pipette filler is a handheld device that the user holds during the pipetting process. It usually has a comfortable grip and ergonomic design for ease of use.

Collet Assembly: The pipette filler comes with an in-built collet assembly. This collet assembly securely holds the serological pipette in place during pipetting.

Power Source: The device is powered by rechargeable batteries or through a direct power supply.

Control Plungers: The handheld unit has control plungers that allow the user to aspirate and dispense liquids with precision. By pressing the upward plunger (look for the ‘up’ mark), the liquid is aspirated into the serological pipette and downward plunger (look for the ‘down’ mark) to dispense the liquid into the container.

Thumb Wheel: A thumb wheel on the instrument’s back allows for easy pump speed adjustments during liquid handling. Users can rotate the wheel clockwise to increase pump speed and anticlockwise to decrease pump speed. 

Pipette Controller
Pipette Controller

Using a pipette filler is relatively straightforward. By pressing the control plunger, the user can aspirate a specific volume of liquid into the serological pipette and then dispense it into the desired location.

The pipette filler offers advantages over manual pipetting, such as increased accuracy, reduced risk of repetitive strain injuries, and enhanced user comfort during prolonged pipetting sessions. It is an indispensable tool in modern laboratories where precision and efficiency are paramount in handling liquid samples.

Aspirating the correct volume using a Pipette Filler

The primary application of any electronic filler/controller is to enable lab users to precisely fill a serological pipette to a certain specific volume and dispense that aspirated volume of liquid into a container for their experiments. However, pipette controllers in the market do not provide any direct mechanism for the lab user to precisely aspirate and dispense a required volume. The methods employed by lab users to achieve this are inaccurate and time-consuming. Users have to either: 

  1. Manipulate the speed controller of the pipette filler to precisely fill gently up to the desired volume 
  2. Fill more than the required volume and dispense slowly (using gravity) to achieve the desired volume

Aspirating and dispensing liquid accurately with a pipette filler requires proper technique and familiarization with the device’s controls. Here’s a step-by-step guide to help you use an electronic pipette filler accurately:

Preparation:

  • Ensure the pipette filler is charged or has sufficient power for your pipetting task.
  • Select the appropriate serological pipette and attach it securely to the electronic pipette filler.

Aspirating the Liquid:

  • Immerse the tip of the serological pipette into the liquid sample you want to aspirate.
  • Gently press and hold the aspiration plunger of the pipette filler. Make sure you don’t aspirate beyond the maximum volume capacity of the serological pipette.
  • Aspirate the liquid more than the required liquid. For instance, if you want to dispense 20 ml liquid, aspirate the 25 ml liquid to begin with.
  • Dispense excessive liquid (5ml extra as per the above example) gently until the liquid meniscus aligns with the required mark on the serological pipette. 

Most of the pipette fillers have the Gravity Dispense feature by which the user can dispense the liquid in drops by pressing the dispense button. This feature does not engage the motor and allows the user to dispense the liquid dropwise and slowly which increases the dispensing accuracy.

Dispensing the Liquid:

  • Position the pipette slightly above the surface of the target container (e.g., microplate well, test tube, etc.).
  • Gently press and hold the dispensing plunger on the pipette filler to release the liquid. Control the speed of dispensing as needed by rotating the thumb wheel clockwise or anti-clockwise. The liquid will flow out of the pipette due to gravity. 

Blow-out Function (Optional):

Some pipette fillers have a blow-out function that expels any remaining liquid in the serological pipette’s tip after dispensing. If your pipette filler has this feature, you can activate it by pressing the corresponding button.

Release the Buttons:

Once you’ve dispensed the desired volume, release the plungers on the pipette filler to stop the liquid flow.

Release the Liquid:

After dispensing, wait for a brief moment before withdrawing the pipette from the liquid to avoid any residual drops on the serological pipette’s tip.

Discard or Retain the Tip:

Depending on the application and your laboratory’s protocols, you may need to discard the used serological pipette after each aspiration-dispensing cycle or retain it for further use (if compatible with your procedures).

Always follow the manufacturer’s guidelines and proper laboratory practices to ensure accurate and reliable pipetting results. Regularly calibrate and maintain the pipette filler for optimal performance.

Microlit Easyfill – Electronic Pipette Filler with Single Knob Dual Dispensing Mode

Microlit Easyfill is a highly dependable pipette filler that has several features that contribute to precise volume aspiration, such as:Electronic Pipette

  • Hold Pipettes Firmly with a Universal Silicon Collet Adapter:

Microlit Easyfill features a Universal Silicon Adapter with internal knurling that can easily accommodate pipettes ranging from 1 ml to 100 ml and securely hold them during liquid handling operations.

  • Comfortable Grip:

Designed with a focus on ergonomics, Microlit Easyfill boasts a comfortable grip. This thoughtful design reduces hand fatigue and strain during extended pipetting procedures, promoting better posture and minimizing the risk of repetitive strain injuries.

  • Prevention of Contamination:

Microlit Easyfill includes a PTFE Hydrophobic In-line Membrane Filter (0.2 microns), which prevents aerosol contamination from an accidental liquid entry. As a result, it ensures aseptic conditions and reduces the risk of cross-contamination between different samples.

  • Speed and Efficiency:

Microlit Easyfill offers continuous pump speed adjustment during liquid handling operations. The efficient performance of Microlit Easyfill enables quick and precise liquid handling. Its user-friendly design and rapid dispensing speed allow researchers to complete pipetting tasks more efficiently, ultimately increasing overall productivity.

  • Battery-Powered Operation with LED Indicator:

Many versions of Microlit Easyfill are powered by batteries, offering cordless operation. This feature enhances mobility and flexibility, enabling researchers to move freely in the laboratory without being hindered by power cords. It has a Red LED flash that denotes ‘low battery’ and a green LED flash that denotes ‘charging’.

  • Precise Gravity Dispense Mode:

To dispense drops dropwise, turn the knob halfway. This option disables the motor and allows the user to dispense dropwise and slowly.

  • User-Friendly Interface:

Microlit Easyfill is designed to be intuitive and user-friendly, making it suitable for both experienced researchers and laboratory newcomers. The instrument’s easy operation allows users to quickly adapt and efficiently perform pipetting tasks.

To know more about the features and functionality of Microlit Easyfill, please contact us at info-usa@microlit.com or visit our website Microlit Pipette Filler.

What are the key differences between Microlit Scitus, Beatus and Lentus Bottle Top Dispensers?

A bottle top dispenser is a common laboratory instrument used to dispense specific volumes of chemicals/reagents, organic and inorganic solvents, oils, and other liquids from bottles or other containers. Manual dispensing has multiple risks, including chemical spillage, poor measures, and even fatal lab mishaps. Bottle Top Dispensers are the go-to instrument for distributing chemicals securely and precisely in a laboratory environment, preventing such dangers and improving lab safety.

Bottle top dispensers have a piston positioned on the plunger. The Piston provides the necessary vacuum in the barrel to precisely aspirate and dispense liquids. The fixed amount of liquid is drawn up into the dispenser cylinder by an upward movement of the piston. As a result, the downward movement of the piston allows the liquid to be released into the container via a dispensing valve. 

Because the piston is in direct contact with a liquid or chemical, it is critical that the piston material be chemically inert to the majority of reagents. Bottle top dispensers eliminate the need to set up a meniscus, which helps in the liquid transfer process.

The key difference between Microlit Scitus, Beatus, and Lentus Bottle Top Dispensers:

Bottle Top Dispensers are available in both fixed and variable volume ranges. The variable volume model, which enables the user to select the volume to dispense based on the volume range and volume increments supported, is the most popular. The volume can be controlled manually using a knob or dial, or electrically using a control panel.

Microlit has an extensive range of bottle-top dispensers with a variety of features depending on the model you choose. Let’s go over the fundamental differences between Microlit Scitus, Beatus, and Lentus bottle top dispensers.

Microlit Scitus:

Microlit Scitus Bottle Top Dispenser
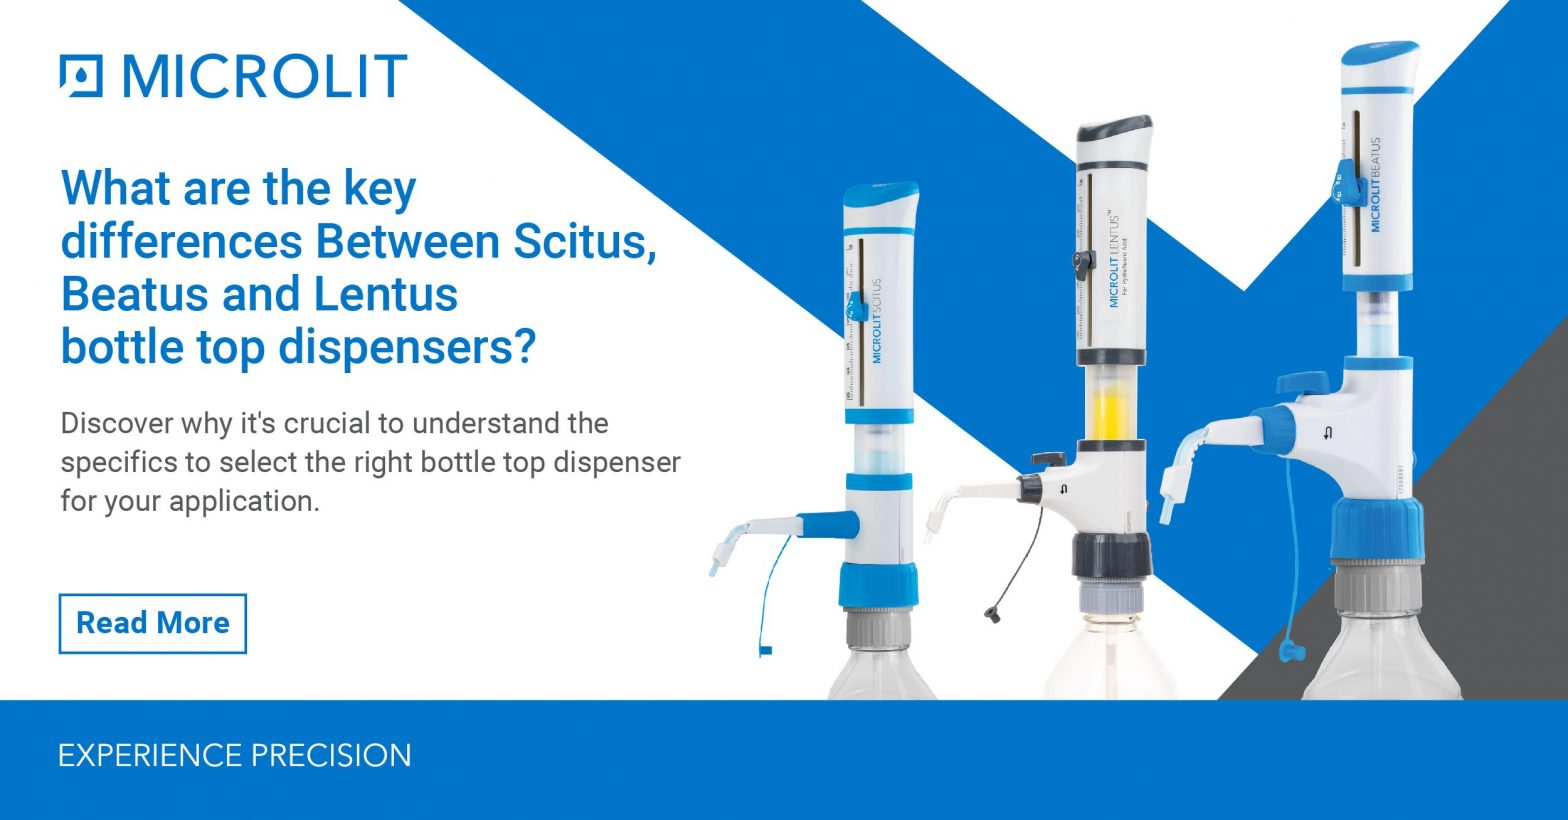
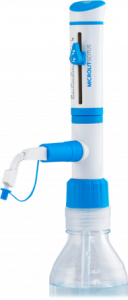
Microlit Scitus is the basic model of Bottle top dispensers that feature Springless Valve Technology for smooth, jam-free dispensing. It has high chemical compatibility and allows for precision in practical laboratory situations. Scitus also includes two product improvements that improve usability: EasyKnob which allows 180° rotation for easy and effortless volume setting and FlexiNozzle which is an adjustable delivery nozzle, that offers a high degree of flexibility, facilitating easy dispensing in demanding laboratory conditions. 

Microlit Beatus:

Microlit’s Bottle top dispenser, Beatus, is equipped with a dual-mode re-circulation valve that allows the instrument to be primed without any liquid loss. 

Beatus Bottle Top Dispenser

It is extremely compatible with a wide range of solvents and can be easily autoclaved. The recirculation valve helps in redirecting the liquid reagent into the mounted container, preventing waste when purging. The dispenser allows for smooth, bubble-free dispensing.

The instrument also includes FlexiNozzle technology, an adjustable delivery nozzle that provides greater flexibility and allows for easy dispensing in tough laboratory situations. Beatus is designed to be ergonomic and intuitive, allowing for higher precision in a real laboratory.

Microlit Lentus:

Microlit Lentus Bottle Top Dispenser is precisely developed for usage with extremely corrosive acids such as hydrofluoric acid, nitric acid, sulfuric acid, and others.

Lentus Bottle Top Dispenser

 This Bottle Top Dispenser is primarily used to handle and dispense high-purity media, as well as acids and bases. The LENTUS Bottle Top Dispenser provides excellent chemical compatibility and accurate results throughout tests. Not only does it perform well with hydrofluoric acid, but it also works well with other chemicals and reagents to achieve precision while maintaining safety in real-world laboratory situations. 

It has Springless Valveand Recirculation Valve technology. This is an excellent option for preventing the loss of chemicals or reagents when conducting experiments. It helps in achieving precision and reliability in laboratories. It is a smart liquid-handling instrument with a perfect blend of complex features and functionalities.

If you want to know more about the whole range of Microlit’s bottle top dispensers, please visit our website at https://www.microlit.us/shop/  or contact us at info-usa@microlit.com.